Last updated on February 11th, 2025 at 12:48 am
Recycled Bottle Fish Mobile
By Jane Lake
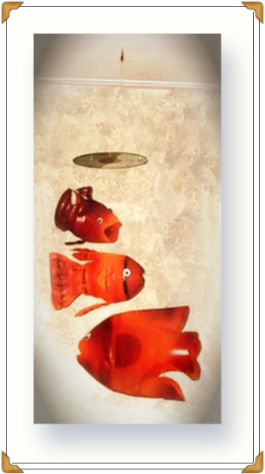
Colorful tropical fish or goldfish swim around in a gentle circle when you suspend them from a recycled CD to make this fish mobile.
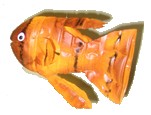
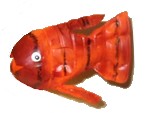
Even close up, you’d be hard pressed to guess the origin of these fish – but all of them are made from humble plastic bottles. From top to bottom, we have a juice bottle fish, a water bottle fish and, our whopper, the diet Pepsi bottle fish.
Although this recycling craft is relatively easy to do, it does involve the use of knives and scissors, and the cutting can be hazardous, so this is not a craft for younger children to do. However, the finished mobile would look great hung in the corner of a child’s room!
Supplies:
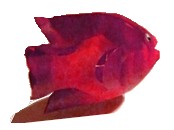
- plastic bottle for each fish
- discarded CD or DVD
- fishing line
- screwdriver and screw (to make holes in the CD; you could also use a small drill, if you have one)
- serrated knife
- scissors
- spray paint in two colors, one light, one dark
- plastic, movable craft eyes
- craft glue
- permanent marker
Instructions:
1. Preparing the CD:
Make three, equally spaced holes about ½ inch from the edge of the CD. We used a Robertson (square head) screwdriver to drive in a screw just far enough to pierce through the CD, then withdrew it to leave behind the holes. You could also use a small drill. Spray paint the papered side of the CD and set the CD aside.
Note: if you don’t have a CD handy, you could also suspend the fish from a plastic lid, a brass ring of suitable size, or even an interesting piece of driftwood.

2. Preparing the Bottle:
Remove the paper wrapping or plastic sleeve wrapping from a clean and dry plastic bottle. Set the bottle on its side and, using a serrated knife, cut off the neck of the bottle.
You also need to remove the bottom of the bottle. Use the serrated knife to start the cut, then continue with scissors.
3. Collapse and flatten the bottom part of the bottle, below the cone-shaped top. If the bottle is ridged, this might crinkle the plastic a bit, but you don’t need to worry as this only adds some interesting texture to the finished fish.
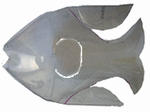
4. Cutting Out the Fish Shape:
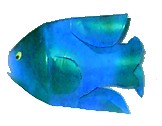
Draw the basic fish shape onto one side, outlining where you will cut around the gills, the top and bottom fins and the tail. A good basic shape is shown here, at left.
5. Hold the bottom of the bottle tightly with your fingers, so that both sides are immovable. If you find it helpful, you could staple or tape the bottom edge to temporarily secure it.
Cut out the curves of the top and bottom fins, going through both sides of the bottle. If you want to change the shape of the fins, you can trim them back later.
Shape the edge of the tail, cutting through both sides, to suit your fish design. A shallow, curving “V” cut, or a simple straight cut, is suitable for most fish.
Cut a small, sharper “V” cut on either side of the mouth.
The gills must be cut out separately. Use your fingers to open out the fish to the original round bottle shape, then carefully cut a “U” shaped gill on each side. Bend both gills outwards, so they stand away from the fish body a little bit.
6. Painting the Bottle Fish:
Follow the general directions and cautions on the paint can label to spray paint your fish; for instance, you’ll want to work outside, or in a well-ventilated area. First, suspend the fish body in some fashion. We upended ours over the mouth of an empty glass bottle. Hold the spray paint about ten inches away, then spray the fish all over with the lighter color of spray paint. The paint will dry in about five minutes, but you may need more than one coat for adequate coverage. It is best to apply multiple thin coats, rather than one thick coat of paint, to avoid runs and streaking.
When the first color is dry, add complementary markings with a darker color of spray paint. This might include spraying the tail, the gills, and part of the face area, or another combination of highlights. Be creative, and aim for a different look for each fish.
7. Add Details
Let the paint dry, then glue on the plastic, “goggle” eyes on either side of the face.
If desired, add straight or wavy stripes, or scale marks, with permanent marker.

8. Assemble the Mobile:
Make three plastic bottle fish to suspend from the mobile. For each fish, cut a length of fishing line. Place a noose knot on the end of the fishing line and secure it around the top fin of the fish. Thread the other end through one of the holes on the CD, over the edge, back under, and through the hole again.
Repeat for all three fish, varying the lengths of fish line so the fish are arranged as a pleasing trio. Knot all three fishing lines together at the top and cut off any excess line.
9. Hang the Mobile:
Suspend your plastic bottle fish mobile where it can be enjoyed for its colors, the fish shapes, and its recycling ingenuity!
If this project pleases you, I think you’d also like Printable Captured Fairy Jar ( no fairies captured in this project, I promise), plus gorgeous Plastic Bottle Butterflies.
This is wonderful but can you tell me how to “collapse and flatten” the center part of the bottle once the top and bottom are cut off? Do you press it with weights or use an iron or heat to get the worst of the curve out?
Hi, Louise, I was able to do this just by putting the bottle on the table and pressing down on top of it with my hand. These were ordinary plastic bottles that once held water, juice or soda pop. I have come across some thicker bottles with deep ridges around them that wouldn’t work very well, but other than that, it should be fairly easy.