Last updated on December 26th, 2015 at 12:20 am
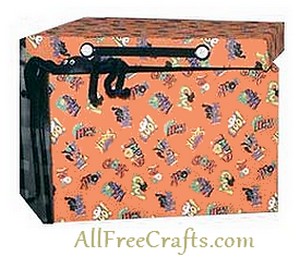
Fabric covered storage box for holiday decorations and trinkets.
Here’s a craft project that answers the question of how to organize all those seasonal decorations that you’ve made for Christmas, Easter, Halloween or other holidays. Neat, tidy, practical – and as soon as you see the holiday fabric decorating the box, you’ll know instantly what’s inside.
This project can be made from new file folder boxes, but you can also recycle other sturdy boxes, especially those with a ready-made lid.
Craft Supplies:
- Fabric of choice
- Craft glue or Hot glue and sticks
- Ribbon piece for label
- Black ribbon and 2 buttons
- File folder box (available at office supply shops)
.
How to:
This is one my many holiday decoration storage boxes, that is identified easily by the fabric. These boxes come folded flat. Leave your box flat and measure fabric piece to fit around entire outside box surface, including the bottom flap. You will end up with only one seam, if covered in this fashion. Repeat for the lid.
Glue fabric to box surface (I used hot glue, it dries quicker and is much easier than craft glue to work with). Don’t worry about a little fabric overhanging, this can be trimmed before assembling your box. Glue your ending seam at the rear of the box, at the side seam.
For the lid, you will need to make a couple of small cuts at the four corners, to fold your lid in shape. Allow your glue to dry completely before assembling your box.
Trim away any fabric that is over hanging, at the edges and assemble your box, following the instructions included with your boxes. Slit fabric where necessary to assemble. It’s that easy.
Glue a piece of ribbon at the front centre of the box lid, add a button to each end of the ribbon.
Copyright © 1999-2015 Susan Spatone All rights reserved. Published with permission from CraftAtHome.com


Leave a Reply