Last updated on April 23rd, 2023 at 12:01 am
Recycled Cereal Box Books and Journals
By Jane Lake
I used to make these journals from cereal box cardboard when my kids were small. I was working as a freelance feature writer for lifestyles magazines then, and my daughter wanted to “publish” her stories just like Mom.
She still has some of those “published” books and they are more charming than ever. There are many ways to decorate these homemade notebooks – from covering the cardboard with decorative paper, to painting, stamping, decoupage, or perhaps a collage of memorabilia.
For dedicated journal fans, we also have free projects to make a Denim Covered Diary, Blue Jean Journal, a Craft Foam Book Cover for kids, and no-sew instructions for covering journals, albums or diaries with fabric.
The following directions, and the photographs accompanying this project, are adapted from The Long Thread: Cereal Box Journal made available by Ellen Luckett Baker via CC BY-NC 3.0.
CAUTION: Because these cardboard notebooks are sewn together on a sewing machine, be aware that there is a very real possibility of broken needles and other unpredictable events. Proceed only at your own risk: this site, the author, and the original creator of these instructions cannot be held responsible for broken needles, injuries or mishaps.
Cutting Corners and Sewing Cardboard:
AllFreeCrafts is reader supported! Many supplies are found at thrift stores so try that first! However, if you buy from an affiliate link on this site, I earn a commission at no extra cost to you. As an Amazon associate, I earn from qualifying purchases. This has kept AllFreeCrafts.com online since 2002. Thank you!
You Will Need:
- cereal box
- maximum of 8 pieces of paper to make a 16 page journal
- strong thread
- rounded corner punch (Amazon)
- paper cutter
- painter’s tape
- Sewing machine
Project Instructions:
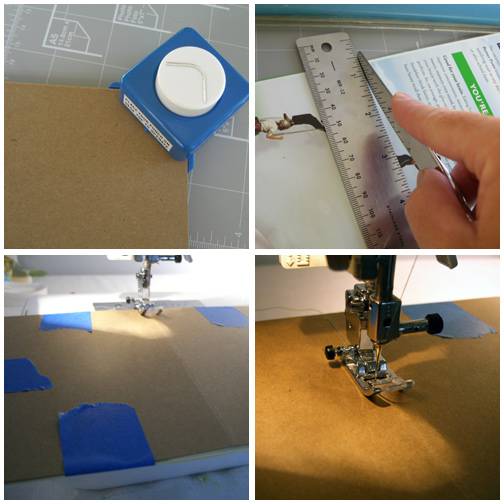
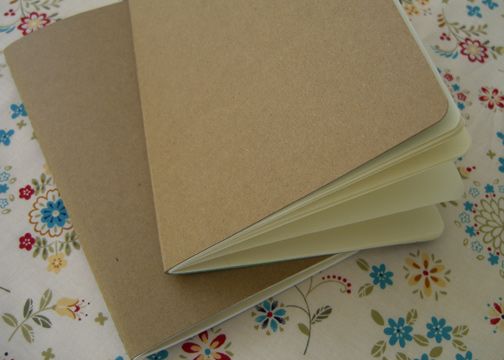
1. Cut the cereal box cardboard to the desired size. The one shown here was cut to 10″ x 7″ to make a 5″ x 7″ journal.
2. Cut the paper to go on the inside about 1/8″ inch smaller all around than the cardboard cover. (*** See more on this in the details set out below).
3. Round the corners with a corner punch.
4. Use a ruler and a untensil knife to score the cardboard down the centre until if folds nicely.
5. Place the cardboard (with the plain side facing up on top of the stacked paper. Tape together, as shown, with painter’s tape.
6. Set your sewing machine tension to low. Position the cardboard and slowly stitch down the scored centre line using long stitches.
7. Fold the journal to a closed position and weight it down with book to flatten.
Important Tips about Positioning the Inside Pages of the Journal
With this type of journal construction, it is sometimes hard to get the pages inside to lie straight and flat, without overlapping the edge of the cardboard cover.
While cutting the papers slightly smaller does help, here’s another trick to try as well:
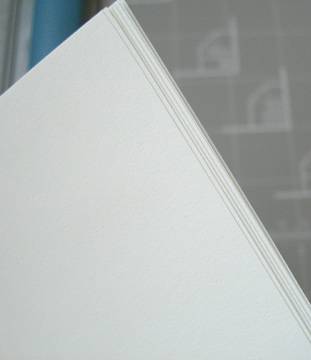
Stagger the papers so that one end looks like the end shown here. Now cut straight across the other end.
You will end up with papers that are very close in size, but the top sheets will be ever so slightly smaller than the bottom sheets.
Arrange the papers so they are stacked evenly on each side, with the slightly shorter pages on the inside and the longer pages nearer the cover.
This helps to adjust for the space taken up by the cardboard and by the thickness of the paper sheets when they are folded over.
Variations:
Fabric Covered Journal
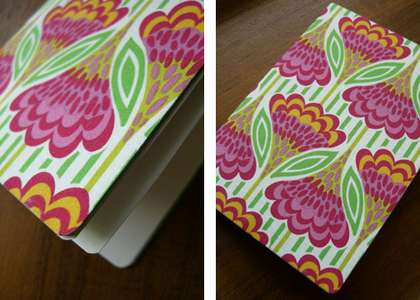
Here is a fabric covered version of the homemade journal. To make one like this, cut fabric about a 1/2 inch bigger all around than your cardboard.
Spray the cardboard with adhesive and position the fabric. Trim off the excess fabric with a rotary cutter.
If needed, apply Dritz Fray Check to the edges to prevent unravelling threads.
Paper Covered Journal
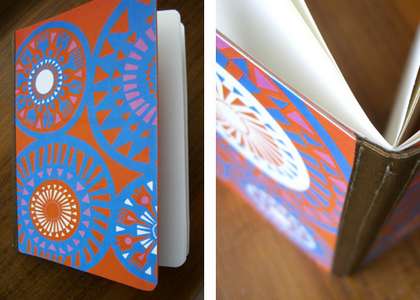
There are so many pretty, decorative papers today, it’s hard to resist them. This journal is covered with paper that is fixed with spray adhesive, like the fabric version, and the inside is lined with a complementary color of paper as well. A length of grosgrain ribbon was added because the paper stretched a little near the center fold. The ribbon was stitched on either side, then down the centre fold of the journal.



Leave a Reply