Last updated on February 9th, 2025 at 09:53 pm
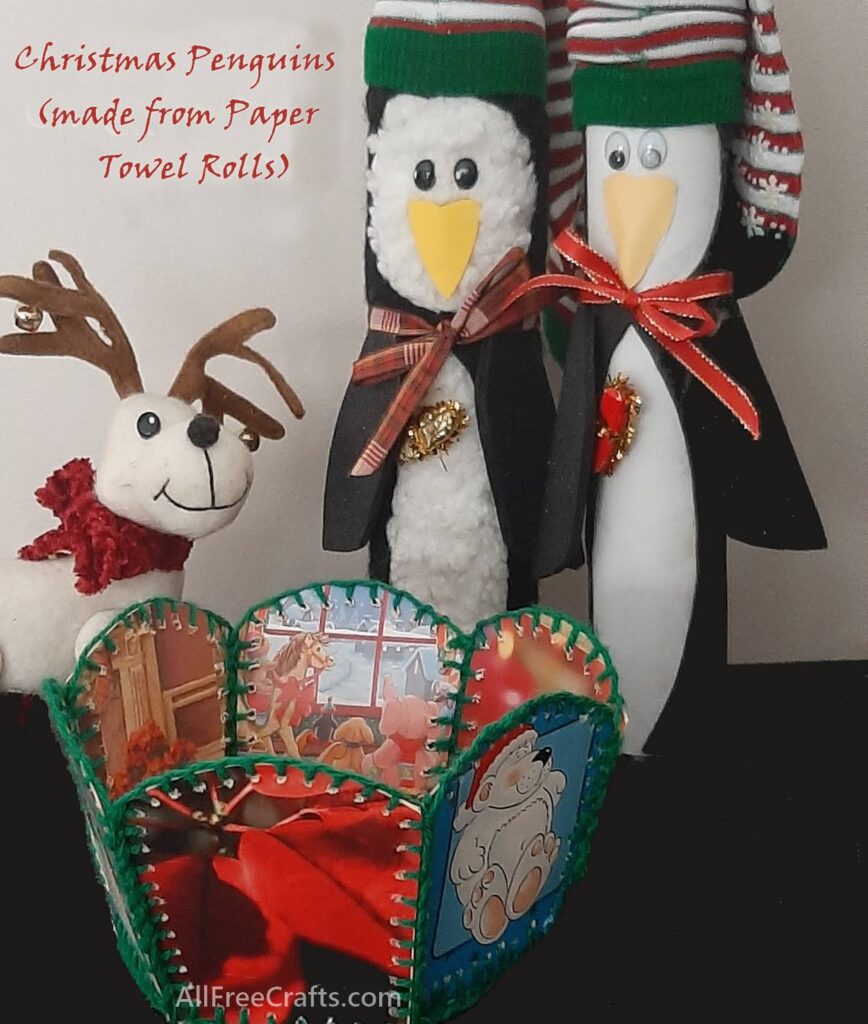
Recycle a paper towel roll and make a cute pair of penguins for Christmas.
by Jane Lake
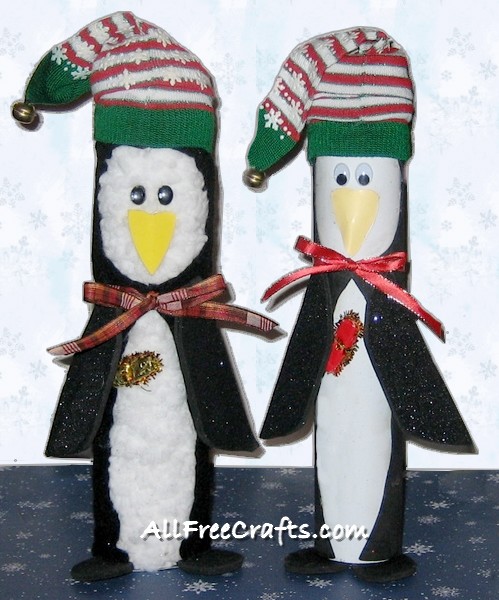
Although both of these penguins begin with a paper towel roll, you can choose how you want to dress them up in their black-and-white penguin suits.
For a fuzzy penguin, you’ll start by wrapping the paper towel roll in fluffy yarn. For the sleek penguin, you can choose to cut the pattern parts from construction paper, felt, or craft foam sheets. It all depends on what supplies you have available and the kind of look that you want.
I have lots more paper roll crafts, including a Paper Roll Leprechaun with a Top Hat, wise toilet paper roll owls with big eyes and lots of colour, and even a cute Paper Towel Roll Dachshund.
Craft Supplies:
For either penguin:
- paper towel roll
- Penguin Body Pattern
- Printable Penguin Wings Beak and Feet Pattern
- craft glue or hot glue gun and glue sticks
- small amount of ribbon
- two artificial animal eyes
- small amount of yellow craft foam, felt, or paper for the beak
- child’s Christmas sock, for hat
- very tiny wrapped gift box or ornament
- small brass jingle bell
- pencil
- scissors
- measuring tape
- rubber bands
- needle and thread to sew on bell
- one black sheet of craft foam or a black metallic glitter foam sheet (if you want slightly glittering wings and feet)
For the fluffy penguin:
- Bernat On the Fringe fur yarn, or a similar fluffy yarn such as Lion Brand Yarn 928-148 Luxe Fur Yarn , in white
- one sheet of black felt
For the sleek penguin:
- one sheet of white felt or craft foam or construction paper
- one sheet of black felt or craft foam or construction paper
For the Fluffy Penquin:

With scissors, snip a tiny cut in the top of the paper towel roll and another cut in the bottom. Slip the end of the yarn in one of these cuts to hold it and add a dab of glue to secure. Begin winding yarn around the roll, pushing up the spirals of yarn as you go, and adding glue here and there, so that the roll is covered completely in fluffy yarn and you cannot see the cardboard. At the bottom, slip the yarn through the cut you made, and cut yarn. Glue the end in place.
For the Sleek Penguin
Cut a sheet of white construction paper, felt or craft foam to fit around the paper towel roll. Spread glue all over the paper towel roll and smooth the sheet onto the glue, covering the cardboard completely. You may need to keep craft foam fastened down with rubber bands while the glue sets. Let the glue dry while you proceed to the next steps.
For Both Penguins
Once your paper towel roll is covered in your choice of white material, measure around it (to establish the circumference).
Measure and cut your choice of black material so that the rectangle is as tall as the paper towel roll and as wide as the circumference that you just measured. The edges of the black material should just meet when you test fit it around the penguin body.
Fold your black material in half lengthwise.
Now you will need to draw a paper pattern for the face and the body openings at the front of the penguin. Fold a single sheet of computer paper in half lengthwise and draw a pattern like the one shown at right against the edge of the page. You may also be able to print the pattern, if your computer allows you to print in original size, which is just slightly smaller than a standard sheet of printer paper.
To draw the pattern yourself, place a glass or a cup about one inch from the top and about halfway across the long edge and trace around it to get the half oval pattern for the face. This needs to be slightly longer than it is wide, or about 3-1/2 inches tall by 1-1/2 inches on the folded pattern cut edge.
Below that, use a plate or a similar curved object, to draw the curve of the lower jacket opening. It needs to be about 1-1/4 inches at its widest point and reaches to the bottom of the page.
Cut out the paper pattern and place it against the long cut edges of your folded black material (not against the folded edge).
Either trace around the pattern, or pin it in place, then cut around it.
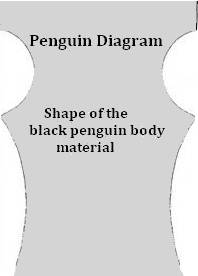
When you open the black material, it should look similar in shape to the diagram shown here and fit nicely around the white body of your penguin, creating the distinctive black-and-white penguin look.
Spread glue onto the back of your black material and set it in place. If necessary, use rubber bands to hold the pieces together until the glue dries.
Print and cut out the Penquin Wings Beak and Feet Pattern which has an actual size of 649 pixels wide and 928 pixels high (or 3.25 inches wide by 4.64 inches high).
Place the beak pattern against yellow craft foam, felt or paper and cut out the beak shape. Put a dot of glue on the top of the beak, at the back, and press it into place on the penguin face.
Glue two eyes above the beak.
Tie a ribbon around the neck, fasten with a double knot, and finish with a bow.
Trace around the wing and feet patterns on a sheet of black craft foam or glittering black craft foam. Cut four pieces of each pattern. Glue two wing patterns together and two feet patterns together so you end up with two wings and two feet of double thickness.
Add a dollop of glue at the top of a wing and slide the wing into place underneath the ribbon. Refer to the photos for placement. Repeat with the second wing.
Glue the feet to the bottom of the paper towel roll, so they stick out at the front and the penguin stands up straight.
Fit the child’s sock on top of the penguin and adjust the folds to make it look like a hat. Sew a brass jingle bell to the end of the hat with a few hand stitches.
Finally, make a tiny little wrapped gift and glue just beneath the middle of one wing.



Leave a Reply