Last updated on April 11th, 2025 at 01:19 am
I made these red maple leaves from construction paper, but you can easily use origami paper or wrapping paper for a more refined finish. In this post, you’ll find step-by-step folding instructions and photos to make your own folded paper maple leaves, plus a short DIY video.
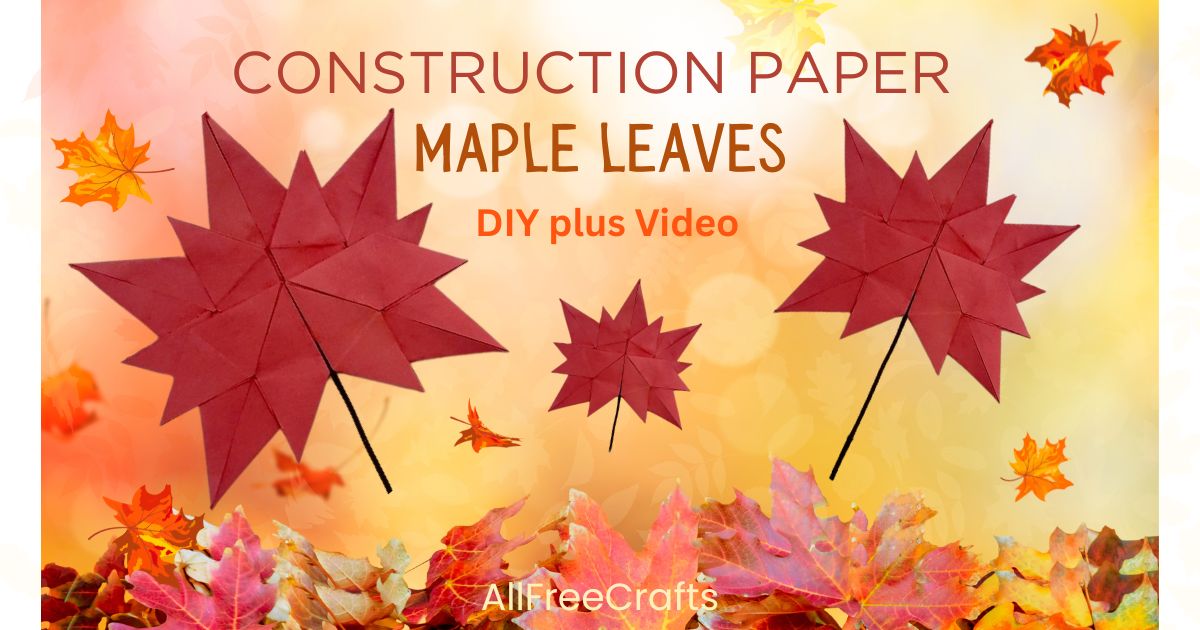
I have edited the video, part two of a series, with part one being How to Make Tiny Paper Gift Bags.
I bought a thousand of these little craft project videos (sight unseen) and I like many of the ideas. But they were too fast, or missed a few steps, which spoiled things. So I’m choosing those I like best, slowing the videos down, and making each project myself so I can share the DIY steps with you.
I hope that my photos and notes on folding the leaves, plus the video, gives you a great tutorial that’s easy to follow. If you try this origami maple leaf project, please make my day and let me know in the comments!
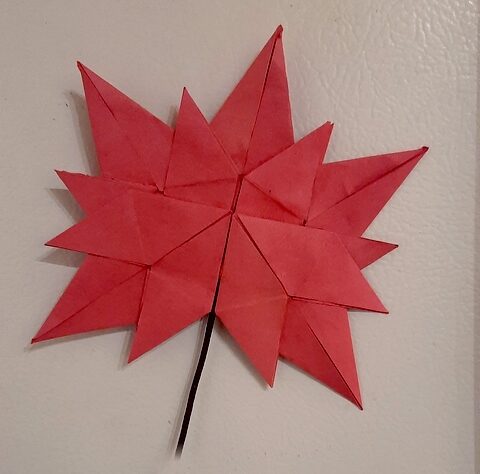
The Red Maple Leaf Made from Paper
You can make paper maple leaves of any color, of course, but I made mine red because it was flag day in Canada and the national flag of Canada includes an iconic eleven point red maple leaf. This version has more points but it’s a lovely representation of a red maple leaf so I went for it. I think it’s ideal for Canada Day on July 1st, or patriotic crafts to adorn Canadian fridges or classrooms nationwide.
You Will Need:
- construction paper, origami paper, wrapping paper or paper of a similar weight and finish
- white glue (preferable) or glue sticks
- ruler and pencil
- scissors
- optional: small twigs, such as red dogwood stems or other small twigs of a suitable size
Try 3D Construction Paper Pumpkins for a companion fall project and Construction Paper Reindeer with free printable template for Christmas.
So here we go:
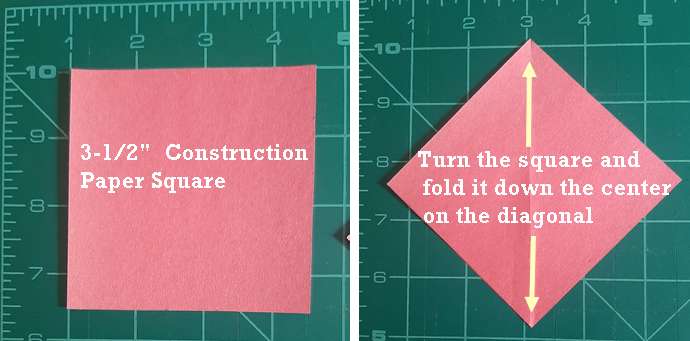
Cut five identical 3.5 inch or 4 inch squares from red construction paper (or from the paper that you prefer).
Each of these squares is used to make identical “leaflets” which, glued together, form the points of a maple leaf. My favourite was the 3.5 inch square. It made a perfect maple leaf for sticking on the fridge by itself, and looks outstanding as multiple maple leaves mounted on a sunny window.
Step One
Start by cutting out a square then turn it on the diagonal and make a fold in the center.
Step Two
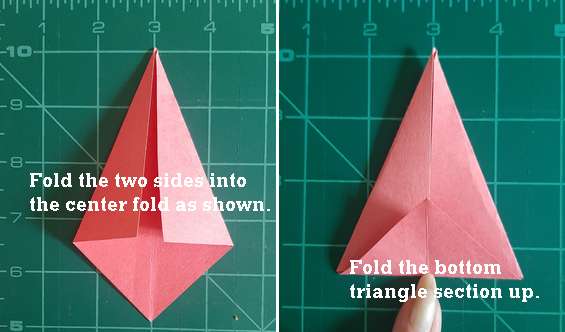
Fold each side of the diagonal in to meet the center line. Fold up the remaining triangle on the bottom.
Step Three
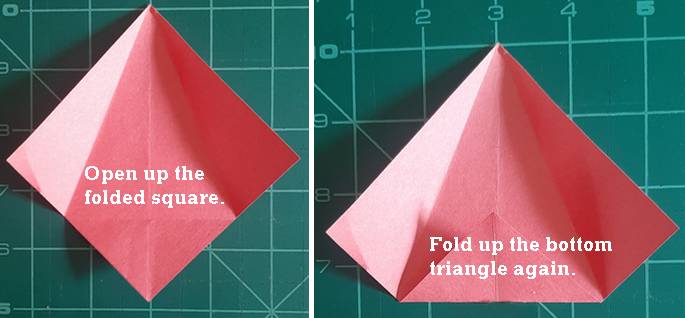
Open up the folded square. Fold up the bottom triangle section again, as shown.
Step Four
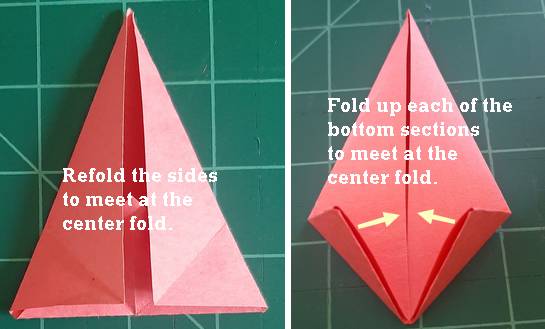
Re-fold the sides to meet again at the center fold. Now take the bottom point of each side and fold it up to the center line, creasing the folds you just created firmly.
Step Five
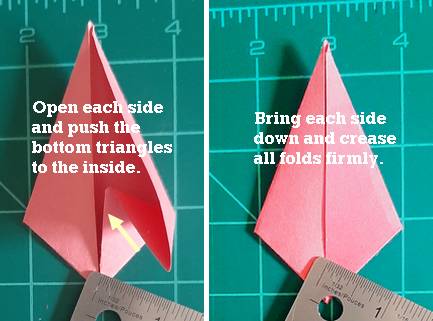
Nearly there! Open each side and push the bottom triangles that you just made to the inside.
You’ll find that the sides want to fold in toward the middle. Get both sides to meet at the center and run your fingers over the folds to reinforce the edges.
Step Six
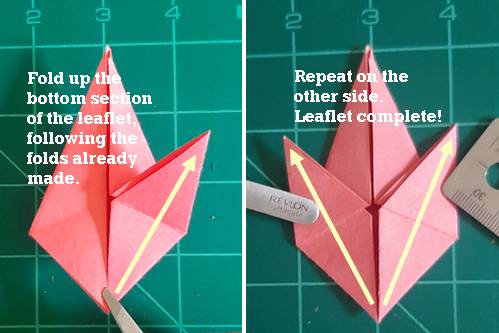
Take the bottom point of one side and fold it up following the pre-existing folds.
Repeat on the other side. Your maple leaflet is complete. Now you just need to make four more!
Assembling a Paper Maple Leaf
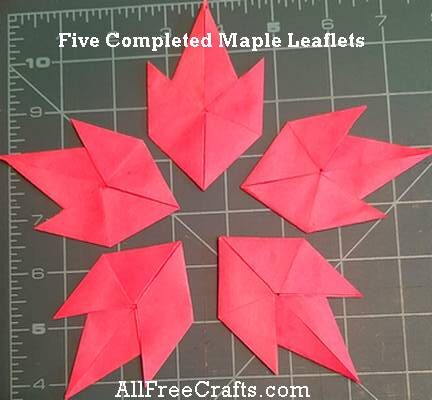
At this point, you should have five maple leaflets made. The next part is the nicest because you are assembling the leaflets into a beautiful construction paper red maple leaf. All you need is a little help from some common white glue.
Editor’s note: I tried glue sticks, but they weren’t sticky enough for a firm bond. A little white glue does the trick though, holding the leaflets together at various points to form the full leaf.
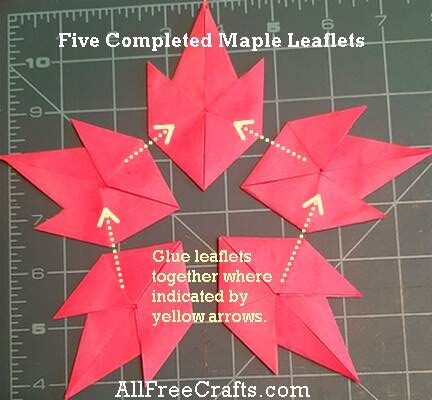
Step Seven
Set the five leaflets out, in a circle as shown, then begin assembly by gluing the leaflets together.
To insert a twig stem, follow the next steps, in order, to enclose the stem as you start gluing the maple leaf together.
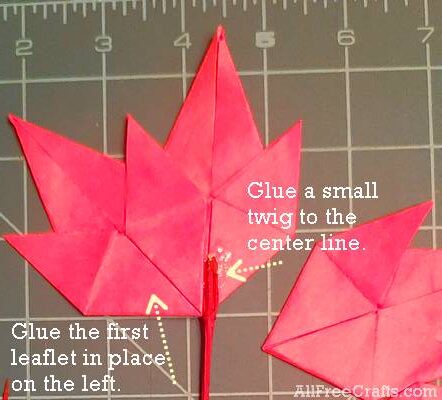
Step Eight
A small twig stem really adds to the character of a paper maple leaf. I used a thin stem of dogwood which adds a nice dark red hue but any small stick would do.
Glue the first left leaflet in place, then glue the top of the twig stem along the center line, butting up to the leaflet.
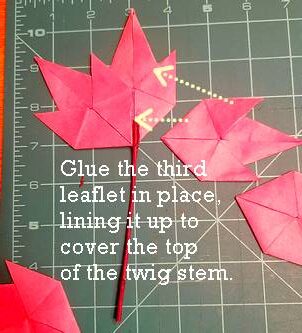
Step Nine
The third leaflet should be glued in place on the right. Position it so that it just covers the top of the twig stem.
Apply a generous amount of white glue to secure everything in place.
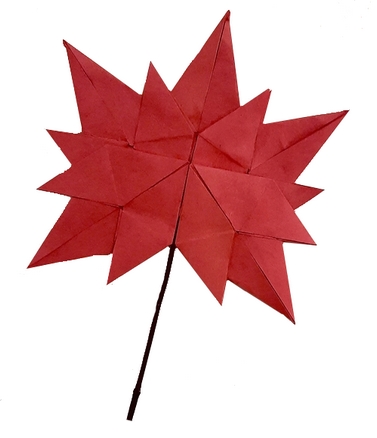
Step Ten
Add the last two leaflets at the bottom, then check adhesion overall. Add a little more white glue to any areas that need reinforcement.
Your construction paper red maple leaf is now complete.
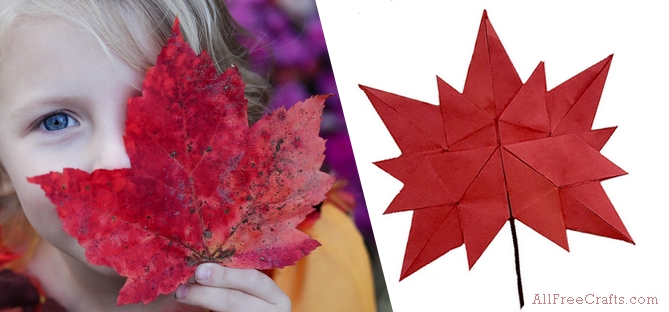
For those who prefer visual instructions, see the edited video below. Please note, the final fold on the leaflets is done slightly differently in the video which makes a more open configuration. Make two leaves, one each way, and see which you prefer!




Leave a Reply