Last updated on March 12th, 2025 at 01:33 am
Here’s a bird house decorating idea suitable for both real or decorative bird houses: decoupaging with egg shells. It covers the bird house in a mother-of-pearl stucco effect which is both strong and protective.
I first used this technique to make an Eggshell Trinket Box and it still has a lustrous, mother-of-pearl look after ten years.
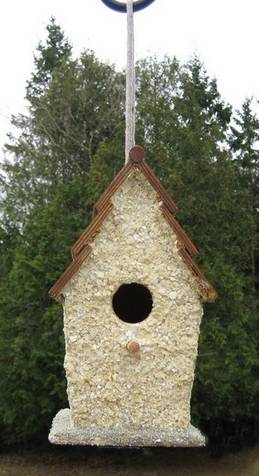
I hung the eggshell bird house in a crab apple tree and the chickadees were checking it out within days. A chickadee family moved in very quickly.
If you’re planning to make the wooden structure yourself, see Build the Right Bird House, for the recommended dimensions of nesting boxes to attract different varieties of birds.
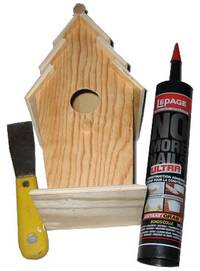
You Will Need:
- wooden bird house
- broken egg shells (about two cups)
- non-toxic construction adhesive, thinset mortar or mastic
- non-toxic, water-based exterior varnish
- putty knife or drywall spatula
- paint brush
- spoon (I used a plastic soup spoon)
- serving tray
- optional: sand, seashells or stones for bottom ledge details
How to Decorate and Protect a Bird House with Broken Egg Shells
1. Break the Egg Shells
To make a supply of broken egg shells, place clean, dried egg shells into a strong ziploc bag, press fairly flat to extract excess air, then seal.
Press down again on the bag to break more shells, first with your hands, then with a rolling pin, or another heavy object.
Keep crushing the shells like this until they reach the desired level of coarseness. Some of mine were quite fine, but I left many larger pieces to make a rough-hewn texture.
2. Apply Adhesive and Egg Shells
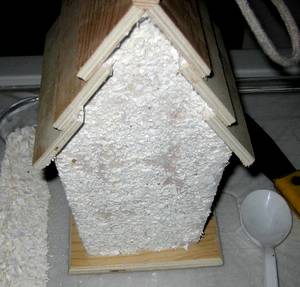
Here, you can see one coat of adhesive and egg shells applied; note the bare spots to be filled in with a little more glue and more egg shells.
Now apply a medium coat of adhesive to the back wall of the bird house, using the putty knife to spread it evenly from under the roof eaves down to the bottom. If there is a ledge on your box, leave this area free of glue for now.
The bird box may be vented under the roof eaves; if so, also leave this area free of glue to allow for adequate ventilation.
Next, lay the bird house face down, in the middle of a serving tray, and pour spoonfuls of broken egg shells over the glue. Use the putty knife, or the back of the spoon, to spread the shells all over the glued surface, pressing down somewhat to get the shells to stick firmly.
Some of the shells will fall off into the tray – you can use these up as you continue around the other sides. Repeat the gluing, and applying egg shells, on all four sides.
3. Fixing Thin Areas
At this point, look for thin areas, or areas where the shells did not adhere well. Apply a little more adhesive in these spots, pressing in more egg shells, until all four walls are adequately covered.
4. Decorate the Bottom Ledge
If your bird house has a bottom ledge, apply adhesive to the top areas, following by a sprinkling of more egg shells or colored sand. You could also bed in small stones, pebbles, seashells or other decorations at this point.
Set the bird house aside and, following manufacturer’s instructions, let the adhesive dry (probably overnight).
5. Apply Varnish
Run your fingers over each of the bird house walls to dislodge any loose egg shells. Liberally apply non-toxic water based varnish over the entire structure including the roof. Alternatively, consider tiling the bird house roof with reycled bread ties.


Leave a Reply