Last updated on November 6th, 2024 at 12:39 pm
Weldons Knitted Teddy Bear Pattern
~ …with a modern twist and photo shoot!
by Jane Lake
I fell in love with this vintage teddy bear pattern the first time that I saw it on Ravelry, where it has been knitted by dozens of adoring fans. At that time, however, I was busy knitting a replacement for my daughter’s childhood bear, which had been lost in a house move. The Free Knitted Cuddle Bear Pattern is available too but, alas, the bear you see in it was lost by the nurses during a hospital stay. So, my adult daughter was in need of yet another teddy bear – which is where Weldon’s pattern for this traditional teddy bear comes in.
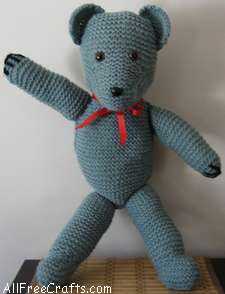
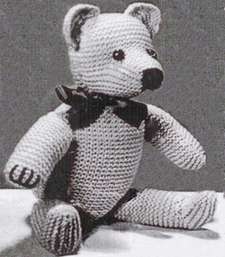
If you followed all that, you’ve probably guessed that, old as I am, I still have my childhood bear, which dates from the 1950s. He’s almost bald, has lost his eyes, and his threadbare paws were patched up with leather by my grandmother about 45 years ago. But I love him all the same. And Weldon’s teddy bear pattern comes the closest that I’ve ever seen to my original bear.
“Hello boys and girls! I’m Teddy.”
I’m providing the pattern directions on this page, along with my own comments and observations (Notes: in italics) about making this bear with modern yarn and stuffing materials.
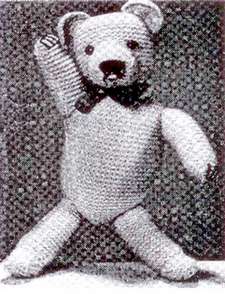
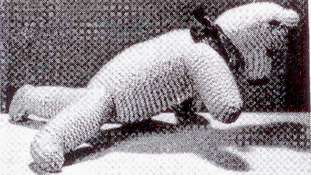
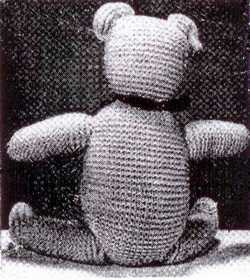
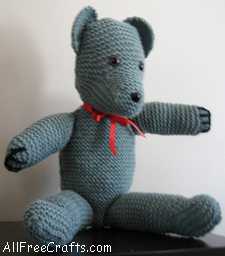
Just for fun, I invited my knitted bear to a photo shoot, reproducing the original poses of the Weldon bear. I hope you enjoy the comparisons.
Knitted Teddy Bear
ORIGINAL MATERIALS: 4 ozs. of Penelope’s W.B. Kwiknit wool; 1 pair of No.8 knitting needles; ¾ yard of 1-inch wide ribbon; kapok or wadding for stuffing; 2 eyes or buttons; a few yards of black wool for embroidery.
MY MATERIALS:2 – 85g skeins of Chunky Sayelle; 1 pair of UK No. 8 knitting needles (I believe these are equivalent to 4mm metric knitting needles); polyester stuffing; 2 safety eyes and 1 black nose; small amount of chunky black yarn.
TENSION: 5 stitches and 9 rows to 1 inch.
MEASUREMENTS: Overall length, after stuffing, about 17 inches.
ABBREVIATIONS: K., knit; st., stitch; sts., stitches; rep., repeat; tog., together; dec., decrease (by taking 2 stitches tog.); increase (by working twice into same st.); g.-st., garter-stitch (every row k); sl., slip.
THE HEAD
Cast on 16 sts. and k. 2 rows. Now continue in g.-st., but inc. 1 st. at each end of next row and every following 3rd row until there are 24 sts. Work 17 rows straight.
Next row: K. 2 tog., k. to last 2 sts., k. 2 tog. Work 2 rows straight. Next row: K. 2 tog., k. to last 2 sts., k. 2 tog. Work 3 rows straight. Next row: K. 2 tog., k. to last 2 sts., k. 2 tog. Work 2 rows straight. Rep. the last 3 rows once, then work the first of these 3 rows again.
Next row: Inc. in 1 st., k. to last st. from end, inc. in last st. Work 2 rows straight. Rep. the last 3 rows once, then work the first of these 3 rows again. Work 3 rows straight.
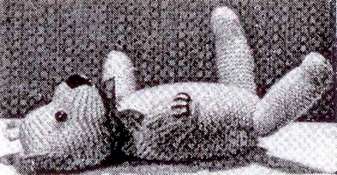
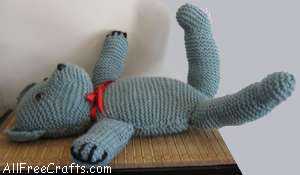
“Excuse me if I rest a moment.”
Next row: Inc. in 1 st., k. to last st. from end, inc. in last st. Work 2 rows straight.
Next row: Inc. in 1st., k. to last st. from end, inc. in last st. Work 9 rows straight.
Next row: K. 17; turn, slipping remaining 7 sts. on a thread (or safety pin).
Next row: K. 10; turn, slipping remaining 7 sts., onto another thread (or safety pin).
Next row: Sl. 1, k. 9; turn. Rep. the last row 15 times more.
Next row: Sl. 1, k. 9, then pick up and k. 8 sts. along left side of centre section and k. the 7 sts. from thread.
Next row: K. these 25 sts., then pick up and k. 8 sts, along other side of centre section and k. the 7 sts. from other thread. Work 8 rows on these 40 sts.
Next row: K. 2 tog., k.16, k.2 tog., k. 2 tog., k. 16, k. 2 tog.
Next row: K. 16, k. 2 tog., k. 2 tog., k. 16.

Notes: If you look at the completed Weldon bears on Ravelry, you’ll see that every bear is slightly different, even though everyone is following the same pattern. Much depends on how you stuff the head. Overstuffing makes the head seem too large for the body and the stuffing will show up where stitches are stretched too far. For this reason, I advise tearing the stuffing into small pieces before stuffing the head, then taking some time to sculpt the head shape between your hands. If you use safety eyes and a nose, like I did, you’ll need to remove some of the stuffing and attach them at this point. I placed the eyes at the beginning of the nose shaping, on either side. Continue adding or removing stuffing to shape the head as desired, but leave the bottom seam open until the rest of the bear is complete. This allows for shaping adjustments before final assembly.
Next row: K. 15, k. 2 tog, k. 2 tog., k. 15.
Next row: K. 2 tog., k. 12, k. 2 tog., k. 2 tog., k. 12, k. 2 tog.
Next row: K. 12, k. 2 tog., k. 2 tog., k. 12.
Next row: K. 11, k. 2 tog., k. 2 tog., k. 11.
Next row: K. 2 tog., k. 8, k. 2 tog., k. 2 tog., k. 8, k. 2 tog.
Next row: K. 8, k. 2 tog., k. 2 tog., k. 8.
Next row: K. 7, k. 2 tog., k2 tog., k. 7. Cast off remaining sts. Fold this piece double so that the cast-on and cast-off edges lie together and join side seams. Stuff head firmly with kapok or wadding, then join the cast-on and cast-off edges together.
The Front of the Body
Commencing at lower edge of body, cast on 4 sts. Now, working in g.-st., inc. 1 st. at each end of every alternate row until there are 26 sts. Work 5 rows straight, then inc. 1 st. at each end of next row. Rep. the last 6 rows once.
Work 10 rows straight. Now dec. 1 st. at each end of the next row and every following 6th row until 24 sts. remain, after which dec. 1 st. at each end of the next 5 alternate rows. Work 1 row, then cast off. Make another section in the same way for back of body.
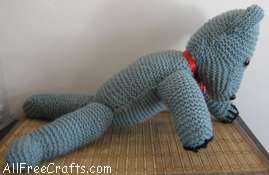
“Now we’re coming along with the knitting.”
The Arms (2 alike)
Cast on 22 sts. and work 38 rows g.-st. Now shape lower edge thus:
Next row: K. 2 tog., k. 7, k. 2 tog., k. 2 tog., k. 7, 2 tog.
Next row: K. 2 tog., k. 5, k. 2 tog., k. 2 tog., k. 5, k2 tog.
Next row: K. 2 tog., k. 3., k. 2 tog., k. 2 tog., k. 3, k.2 tog. K. 1 row; cast off. Fold the knitting double widthwise and join side and cast-off edges together. Stuff opening, then gather the top edge.
The Legs (2 alike)
Cast of 24 sts. and work 40 rows g-st.
Next row: *K. 1, k. 2 tog.; rep. from * all along row. K. 1 row.
Next row: K. 11; turn, slipping remaining 5 sts. onto a thread (or safety pin).
Next row:. 6, turn, slipping remaining 5 sts. on to another thread.
Next row: Sl. 1, k. 5; turn. Rep. the last row 9 times more.
Next row: Sl. 1, k. 5, then pick up and k. 6 sts. along left side of centre section and k. the 5 sts. from thread.
Next row: K. 17, then pick and k. 6 sts. along other side of centre section and k. the 5 sts. from other thread.
Work 6 rows g.-st. over these 28sts.
Next row: K. 2 tog., k. 19, k. 2 tog., k. 2 tog., k. 10, k.2 tog.
Next row: K. 2 tog., k. 8, k. 2 tog., k2 tog., k. 8, k. 2 tog. K. 1 row, then cast off. Fold the knitting double, so that the side seams lie together, thus forming the back seam of leg and foot seam. Join this seam, then stuff leg and gather up top edge.
The Ears (both alike)
Cast on 8 sts. and k. 1 row, then work another 5 rows g.-st., but inc. 1 st. at both ends of each row. Work 4 rows straight.
Next row: *K. 2 tog.; rep. from * all along row. Cast off.
“So this is the end. Cheerio!”
TO MAKE UP
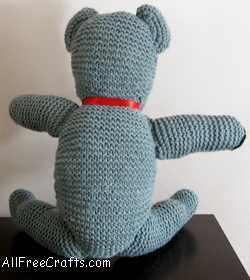
Join the back and front sections together at outer edges, leaving an opening at top for stuffing. Stuff firmly, then sew up opening.
Sew a leg to each side of narrowest part of body, then sew an arm to each side of top. Attach head on top of body. Sew an “eye” to each side at top of nose shapings.
With the black wool, work a few satin stitches on point of nose, then work the mouth in stem-stitch.
Curl the ears round slightly and sew them on top of head. Then, using the black wool, work 4 blanket stitches at base of each arm. Finish teddy with a bow of ribbon.
Leave a Reply