Last updated on March 6th, 2016 at 12:06 am
DIY Sand Painted Trinket Box
by Twila Lenoir
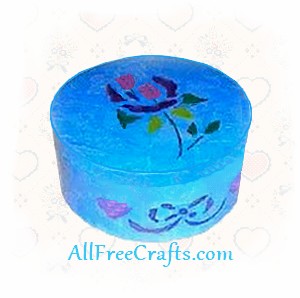
Make your own sand paint to give texture to this homemade trinket box design, which also features stencil painting.
Supplies:
- Any size wood chip box
- White acrylic paint
- White sand
- Acrylic paint for the stencil design (I used gold and blue)
- Felt (to line the inside of the box)
- heart and bow stencil, or your choice of stencil design
- glue
- Mirror (optional)
.
Instructions:
Start by sanding any imperfections. Most wood chip boxes don’t need any sanding.
Trace the bottom of the box on felt and cut just inside the line you traced. Set aside.
Put on the box top and trace the bottom lip of the lid with a pencil. When you apply the sand paint, you should not go above this line. Paint this area in plain white acrylic paint.
Now mix sand in with white paint so that the paint takes on the texture of wet sand at the beach. Paint your white sand paint on the top and sides of the lid and the sides and bottom of the box, making sure you don’t apply sand paint over the line that you traced. Let the paint dry.
Now paint the inside of the lid and inside the box, in the color you have chosen for the felt lining. I used blue for both paint and felt. For contrast, paint the band on the box lid in the same color that you choose for the heart in the stencil painting.
Don’t use adhesive to hold your stencil on the new sand paint; instead, just hold it down steadily and fill in with you choice of acrylic paint colors. Stencil a design on both the top and sides of the box. Finish off with a sealer. I used a satin finish.
Finally, glue the felt liner inside the box. If you wish, you could also make a felt liner for the inside of the lid. Glue in the felt lid lining, then glue a mirror to the center of the felt. Enjoy your new sand painted and stenciled heart trinket box!


Leave a Reply