Last updated on March 7th, 2016 at 12:57 am
This free painting pattern to decorate a wooden door hanger was originally featured in Canadian Crafter Magazine. You can choose whether to paint the ladybugs and bees freehand – or you may use rub-on transfers instead.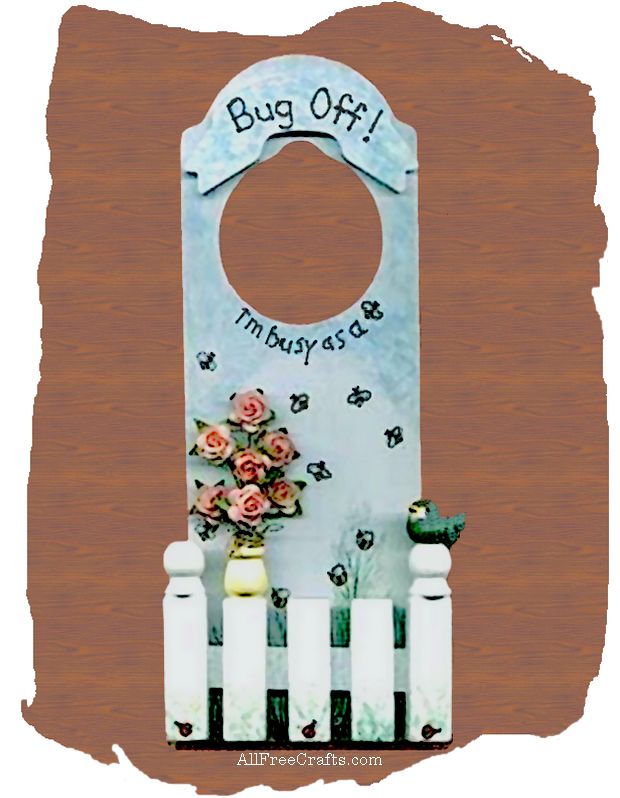
Craft Project Supplies:
- Wood Door Hanger
- Wood Ribbon Label
- 7 Wood Craft Blocks
- 2 Wood Finial Balls
- 1 Mini Wood Candle Cup
- 1 Bird Ornament
- Acrylic Paints (blue, white, green, yellow)
Bee and Ladybug Rub-on-transfers - Craft Glue
- 4 Small Screws (optional)
- 220 Grit Sandpaper
- Paper or Ribbon Flowers (approximately 7, depending on size)
- Paint Brushes
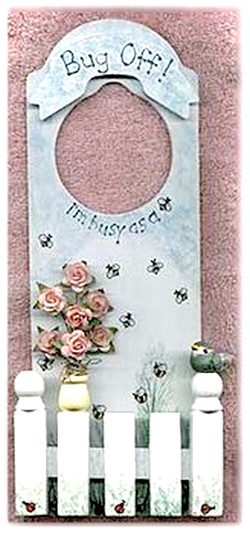
- Keep the photograph close by for reference when creating your hanger.
.
Craft Project Instructions:
Sand all wood pieces to remove any rough edges. Wipe with a damp cloth to remove any dust. Glue together two craft block e nds lengthwise and allow the glue to dry (this will be the fence back support).
On top of the fence support, glue in place five craft blocks, spaced evenly and allow the glue to dry. This will be your fence. Glue small finials or balls to the end posts of the fence.
Paint all wood pieces with white paint and allow the paint to dry. A second application of paint may be required for even coverage.
Paint candle cup with a diluted (1 part water, 1 part paint) yellow paint and allow to dry. Bunch together small paper or ribbon flowers, wrap a teeny piece of Spanish moss around the bottom stem of the florals and glue the flower bunch inside the candle cup.
.
Glue a small bird ornament to one fence post finial. On the door hanger, paint a little grass at the bottom of the hanger. To do this, simply dip a paint brush in green paint, wipe away most of the paint on a paper towel and gently dab the brush along the bottom of the hanger and up from the bottom about one inch creating an uneven and ragged edge of green paint. Allow this paint to dry. With a fine liner brush or a toothpick,draw fine lines from the bottom of the hanger up, to create the appearance of grass sprigs. Paint the bottom of the fence area using green paint in the same manner, but not adding brush strokes or lines to the fence area. Refer to photo for details.
Paint the upper portion of the hanger and wood ribbon banner with blue paint, in the same manner as for the grass, but do not add fine lines. You want the white paint to show through the blue paint, so keep as little paint on the brush as necessary to create this effect.
Allow all of your paint to dry. Apply rub on transfers or you can paint ladybugs and bees, randomly over the lower half of the hanger. Do not place the bee at the end of “I’m busy as a…” until you have painted the words. This will allow you to line up the bee with your written words.
 Glue your ribbon banner and fence in place on the hanger (refer to photo). I used two small screws for the fence and another two for the banner. I screwed from the back of the hanger. This is not absolutely necessary, but if you plan to use your door hanger, it will take a little abuse and the screws will give it a little extra holding power. If you don’t use screws, you many need to clamp your banner and fence to the hanger until the glue is dry.
Using white paint and a very fine liner brush, write “Bug Off!” on the ribbon banner and “I’m busy as a ” on the hanger, with a small bee outline finishing the sentence and referring to the photo for placement. Finally, glue your flowerpot in place on the fence.
Copyright © 1999-2016 Susan Spatone
Published with permission from CraftAtHome.com

Leave a Reply