Last updated on January 22nd, 2021 at 04:36 pm
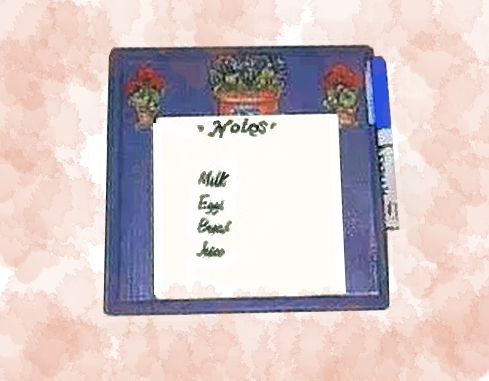
Personalize this homemade dry erase tile notepad with your choice of decals, or painted stencils.
by Twila Lenoir
Craft Supplies:
AllFreeCrafts is reader supported! Many supplies are found at thrift stores so try that first! However, if you buy from an affiliate link on this site, I earn a commission at no extra cost to you. As an Amazon associate, I earn from qualifying purchases. This has kept AllFreeCrafts.com online since 2002. Thank you!
- 4 x 4 white tile
- 6 x 6 wood block
- black permanent marker
- rub on decals or stencil to paint your own design
- dry erase marker
- acrylic paint
- 2 part epoxy glue
- small velcro strip
- picture frame teeth hanger
Project Instructions
1. You can either cut out your 6 inch square or buy one already cut to size.
2. Use a white tile left over from other projects, or purchase inexpensively in home decor stores.
3. First, sand the wood square and wipe off any dust. Paint the wood the color of your choice in acrylic paint. I chose to do only one coat in order to see some of the grain in the wood.
4. After the wood square is dry, apply your choice of rub on decals or paint on a stencilled design.
5. Seal the wood block with sealer – I used a satin finish sealer.
6. With the permanent marker, write at the top of the tile, “Notes” or “Grocery List.” I wrote “Notes” so when I place it outside and someone stops by when I’m not home, they can leave me a message.
7. Using the epoxy glue, glue the tile to the center of the wood block. This glue is easier than it seems to use and creates a permanent bond.
8. Attach the sticky side of a strip of velcro onto the wood and attach the matching piece of Velcro to the dry eraser. Now attach the marker to the wood.
9. Finally, attach the picture frame teeth hanger on the back of your tile holder to hang it wherever you like.



Leave a Reply