Last updated on April 10th, 2023 at 07:56 pm
How to Make a Wreath for Spring
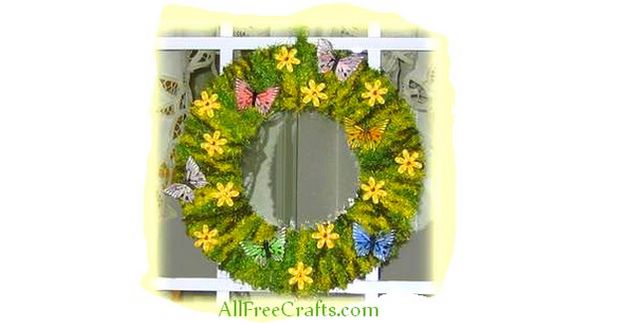
This homemade spring wreath cost me less than two dollars to make, and it adds a cheerful note to my front door while I’m waiting for the first of the spring bulbs to bloom in the garden.
by Jane Lake
The supplies are inexpensive – the base is made from recycled cardboard – and the project can be completed in under an hour.
- corrugated box cardboard (such as the side of a cardboard grocery box), at least 12″ inches square
- one skein of novelty or fun fur yarn in light green or variegated green and yellow (mine was bought at the Dollar Store and is labelled as Needle Crafters Multi, Stranded Mini Curls, 50g, 100% polyester)
- 12 pack of scrapbooking daisies with orange gem center, about 1½ inches
- 6 feather butterflies with wire stems
- pencil
- scissors
- measuring tape
- large plate and small plate to draw two circles
.
Project Instructions:
Make Cardboard Circle(s)
Draw a circle onto the box cardboard, with a diameter of about 12 inches. I traced around a large pie plate to get the bigger circle, then traced around a bread plate in the middle. If you do this, measure the distance from the edge of the smaller plate to the outer circle and move the plate around until it is evenly centered. Or, if you know how, use a pencil, string and thumb tack to scribe the two circles.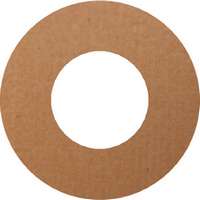
Cut out the large circle then cut out the hole in the middle, so you have a cardboard wreath shape similar to the one shown here.
TIP: If your cardboard circle is thin, or seems too flimsy, make another one. Hold both of them together, or glue them together, then proceed with remaining instructions.
Wrap Yarn
Remove the label from your skein of yarn and begin wrapping it around the cardboard donut, pushing the yarn up through the middle hole, up, over and behind the cardboard, then back through the hole again, working just as you would to make a pompom.
Keep going around the wreath, gradually filling in sparse areas. By the time you are finished the cardboard should be completely hidden beneath the yarn.
Just before you come to the end of the yarn, double over the strand and tie it in a knot to make a loop for hanging. Knot this loop to a few of the wrapped strands to secure. The loop now represents the top of your wreath.
Add Daisies and Butterflies
Obviously, you can use all sorts of embellishments here; I just like daisies and butterflies. But silk pansies, crocus, daffodils or snowdrops would also look great for spring. Add a few decorated eggs and you have an easy Easter wreath.
Do a dry run first – place the wreath on a table and arrange the flowers and decorations on top until you have a pleasing arrangement. The scrapbook daisies had double-sided tape on the back, but if yours don’t, you will need to apply glue to get them to stick.
Fold over the thin wire stems of the butterflies a few times (I made a rough paper clip shape with the wires), then slide the folded wire under the yarn where you want the butterfly to be. Wiggle the wire a bit, until it catches hold under the yarn; ideally you’ll be able to position the wire so that it is partially woven under and over a few strands of yarn. Tug gently, and the wire should hold. Position the butterfly how you would like it; some of mine rest on the yarn, others are held up by the invisible wire about ½” from the wreath.
Finally, hang your wreath in a reasonably sheltered spot, where it will not be subject to strong winds or wet weather.




Leave a Reply