Last updated on November 17th, 2023 at 07:19 pm
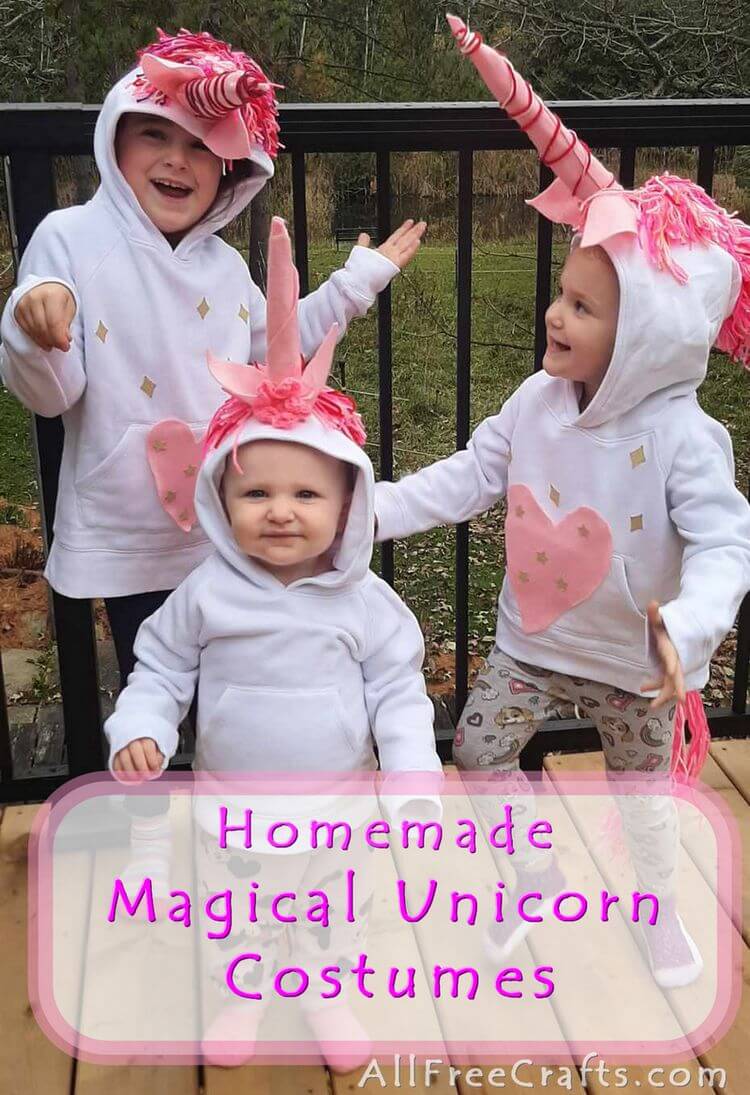
This trio of magical unicorns simply can’t wait for Halloween. With their three homemade unicorn costumes, they are ready for dress-up time now and ready to fulfill their destiny.

If you follow our step-by-step guide, your magical herd of unicorns can join ours for trick-or-treats!
By Jane Lake and Hope Dean
YOU WILL NEED:
AllFreeCrafts is reader supported! Many supplies are found at thrift stores so try that first! However, if you buy from an affiliate link on this site, I earn a commission at no extra cost to you. As an Amazon associate, I earn from qualifying purchases. This has kept AllFreeCrafts.com online since 2002. Thank you!
- White hooded sweatshirt (Amazon link): One comfortable “hoodie” for each child.
- Yarn: Balls of yarn in red, pink, white and purple, as shown, or any combination of the child’s favorite colors.
- Pink felt: One sheet of felt for the unicorn’s horn and another for the unicorn’s ears and the heart shape on the front of the costume.
- Stuffing: Small amount of polyester stuffing.
- Tools: Scissors; hot glue sticks and hot glue gun.
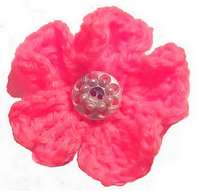
- Optional: Crocheted flower (free on-site crochet pattern) and Battery-powered LED light string (Amazon link). This adds a magical touch to the unicorn horn for kids. The only other thing they could wish for, these unicorns, is a magic wand.
So, what we’re gonna do is start with four balls of yarn in different colors. You can see where this going: around your hand.
Step 1: Make Tufts of Yarn for the Unicorn’s Mane and Tail
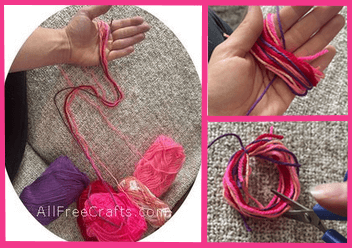
Wind Yarn Around Your Hand
- Start the unicorn’s mane by winding four strings of different colored yarns around the palm of your hand.
- Wind the yarns 3 to 4 times around your palm. Tie a small string of yarn around the yarn, in the middle of your palm, as shown, to hold the yarn together.
- Slide the circle of yarn off your hand then cut the circle in half, making your cut directly opposite the section of yarn that you just tied together.
You have now created a “tuft” of the unicorn’s mane. You’ll need more than a few, but it’s not an exact science. Smile.
Make as many multi-colored “tufts” of yarn as you think you’ll need to make the unicorn’s mane nice and fluffy. If necessary you can always make a few more later on.
For now, set the yarn tufts aside and let’s make a unicorn horn from one sheet of felt.
Step 2: How to Make a Felt Unicorn Horn with No Pattern
There are tons of tutorials out there showing how to make a unicorn horn using a printable pattern. And this No Sew Felt Unicorn Horn Headband youtube video (2.29 minutes) is sweet.
But it’s also very easy to craft a homemade horn from a single sheet of felt without a pattern. You just roll it into shape and hot glue it together.
Here’s how:
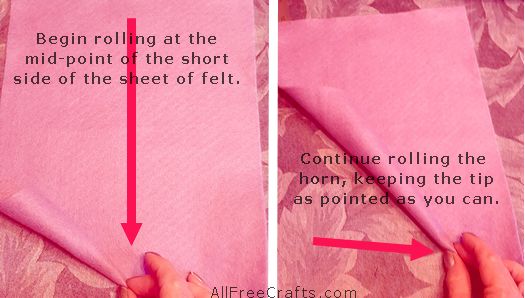
The secret is in keeping the tip of the horn nice and pointy. But if it gets a little bigger than you want, no problem – you can adjust the shape when it comes time to glue it together. Which is now.
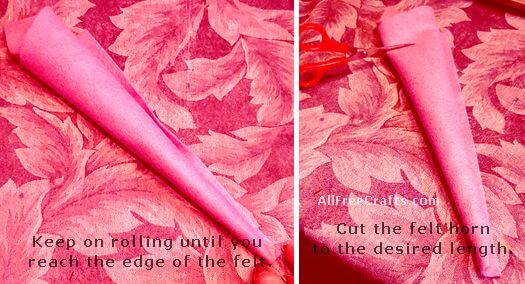
Fire up the glue gun and apply a bead of hot glue all along the long edge of the horn. Press the edge in place until the glue takes hold. This won’t take long.

As you can see, each unicorn horn will be unique. And that’s ok, because they are all fine just the way they are!
Next, add some stuffing to the inside of the horn using your index finger to push it gently into place. Use enough stuffing that the horn will stand up straight and hold its shape.
Enclose the stuffing by hot gluing a small felt circle to the bottom of the horn.
Don’t Forget to Make Unicorn Ears
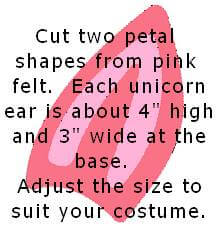
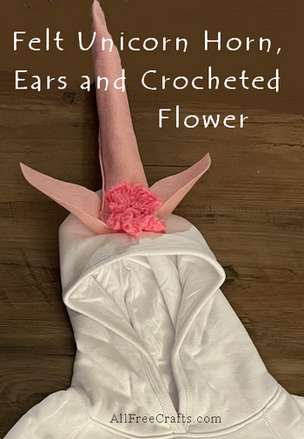
Draw your own petal-shaped pattern on paper then cut two of these unicorn ears from pink.
The ears that you see on our costumes are about three inches long at the base and about four inches high. One of these felt ears is reversed to create two separate left-and-right ears.
Step 3: Position the Unicorn’s Horn and Ears
If the sweatshirt that you’re using has a center seam running straight through the middle of the hood, then your job here is easy.
Simply hot glue the bottom of the horn to a spot right in the middle of the hood, placing it a few inches away from the face edge of the hood.
Following a center seam helps but, if you can’t do that, just crease the hood along its natural lines to find the center top spot. Use that as your guide for the horn placement. Hot glue the horn in its permanent position.
We added a sweet crocheted flower to the front of each horn, as shown. This is optional. You could also use a silk or faux flower.
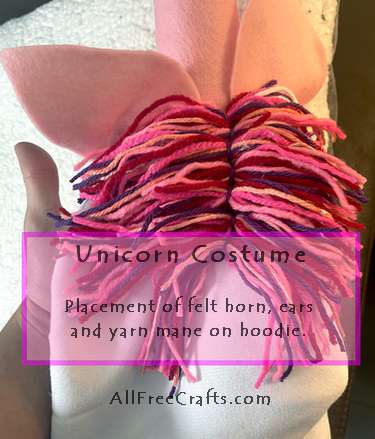
Also optional is a pink felt heart hot-glued on the front of the hoodie.
For heart placement, see the main photo, above.
Glue on the Felt Ears
The unicorn’s ears are placed behind the horn.
Glue one ear so that it leans to the left and the other ear so it is leaning to the right.

DID YOU KNOW: The unicorn is Scotland’s national animal?
No, really!
Step 4: How to Make a Multi-colored Unicorn Mane and Tail from Yarn
Remember the tufts of yarn that you made from multi-colored strands of yarn? You need all of those now to make your unicorn’s mane.
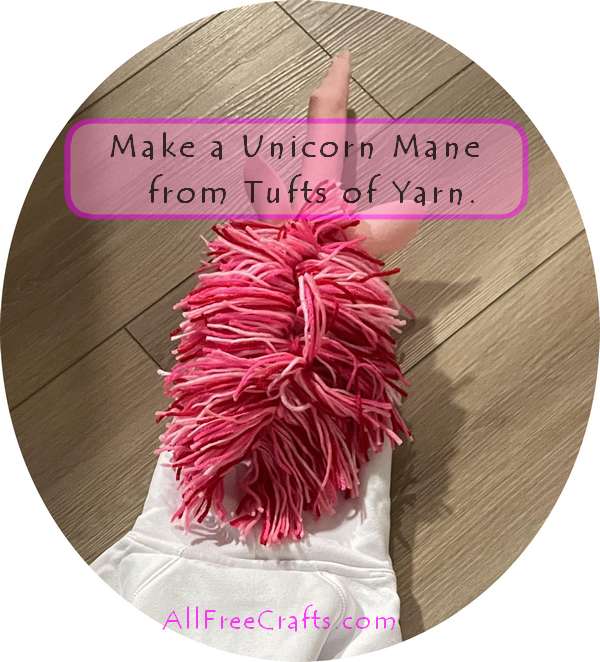
Multi-colored Unicorn Mane
- Apply a small blob of hot glue to the tied end of your first yarn bundle. Working quickly, apply this bundle of yarn to the center front top of the sweatshirt hood. Hot glue another tuft nearby.
- Keep adding these tufts, until you’re midway down the hood, and you’ll see the magic appear before your kids do. You just made those colored pieces of yarn into a unicorn mane.
Unicorn Tail:
Make the unicorn’s tail from the same balls of yarn that you used to make the mane.
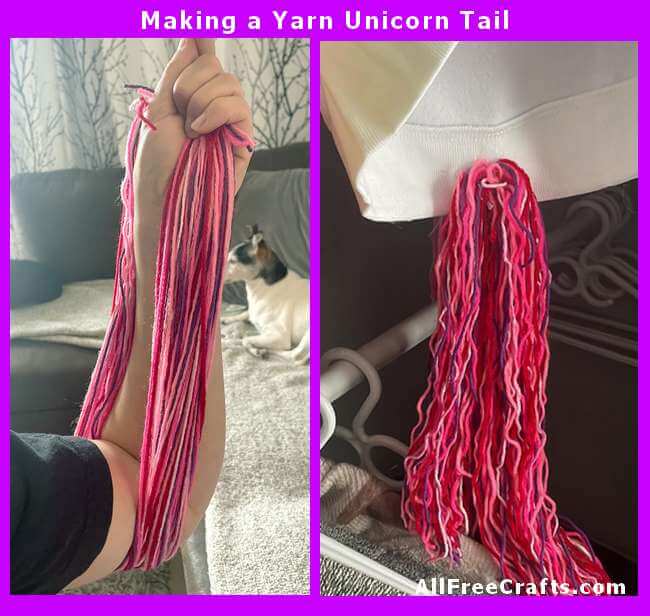
- Wrap the yarn strands from your thumb crease to your elbow, going around until it is thick enough to make a tail (about 17 times for us).
- Carefully remove the circle of yarn from your arm and tie it together at the top with another small piece of yarn.
- Cut across the bottom to make a nice, long, thick, multi-colored stringy tail.
- Apply hot glue all around the top inch or so of the tail to help secure the yarn strands. Finally, fix the tail into position, hot-gluing the top of the tail to the inside of the sweater, at the center back.
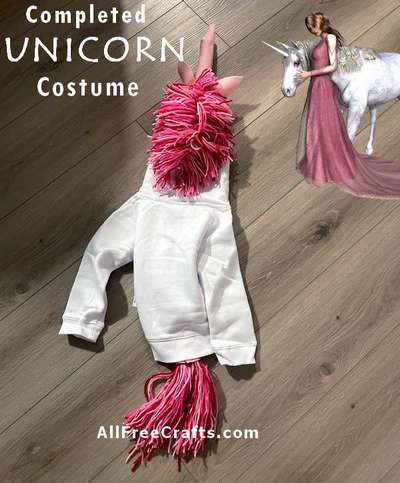
Let’s Add Some Unicorn Magic
Your homemade unicorn costume is now completed. Good Job!
Now let’s add some unicorn magic bling!
We added a battery-powered LED string light and a hand-held light up wand or baton (Amazon links) to each unicorn costume.
To add the fairy lights, you’ll need to pierce a small hole through the hoodie, just behind the horn.
We used a seam ripper to make a small split in the fabric. Feed the first LED light through this small hole and pull enough wire through to wind it around the horn.
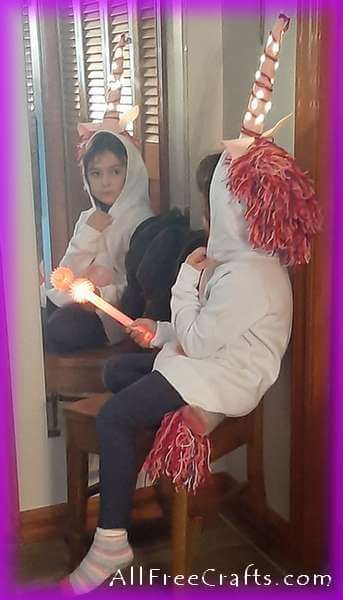
Leave the small battery pack inside the hoodie, positioned so that you can reach inside the hood to turn it on and off.
Use a spot of hot glue to secure the battery pack in place.




Leave a Reply