Last updated on January 11th, 2025 at 11:58 pm
How to make your own homemade Easter tags.
Craft Supplies:
» Toilet Tissue
» Card Stock (choice of colours)
» Deckle Scissors or other specialty scissor of choice
» Tacky glue
» Rubber stamps of choice
» Towel
» Coloured pencils (crayons, markers or paint will work too, but you’ll need to be a little more careful when using these types of colouring tools)
Project Instructions:
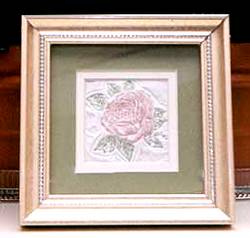
To make the picture centre you will need toilet tissue. Layer one sheet of tissue on top of the other (about eight sheets of two-ply toilet tissue). You can make these using less or more tissue, depending on the effect you would like to achieve, but start with eight sheets. If your tissue is one ply, use 16 sheets instead of eight.
You will need a flat clean working surface for this and the best place is your kitchen counter top. Working near the kitchen sink will make your job easier. Take your layer of eight sheets of tissue and saturate them with water. Gently press a little of the water out of the tissue (press against the side of the sink or a bowl). Place your rubber stamp with the stamp facing up and place your saturated tissue on top of the rubber stamp imprint. With your fingers, gently press the tissue into the stamp design.
Once your tissue has a good impression, place a towel over the tissue and press with the palm of your hand to remove access water from the tissue. Move the towel and press again until no more water transfers to the towel. Gently peel the tissue away from the stamp and set aside to dry. These impressions must be completely dry before you continue.
Now that your tissue impressions are dry, you need to trim away the excess tissue using specialty scissors or you can dampen the edges of the tissue and tear away the edges for a nice effect. Be careful not to allow the water to touch your impression or you will have to start all over again.
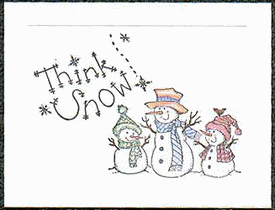
Using pencil crayons, colour in the design of your rubber stamp. Do not apply a lot of pressure when colouring your design. You can colour the entire design or just add a little colour to specific areas of your impression.
Cut card stock to desired shape and size. Decide how many layers of card stock you would like your card to be. Cut the largest size first. After cutting your largest piece of card stock, use this piece as a template and cut the next layer slightly smaller, then using this smaller piece of card stock as a template, cut the next piece slightly smaller and so on.
Using tacky glue (do not use any other water base glue for this project), glue the corners of the cardstock layers and place where desired on top of each layer. To glue your tissue impression, apply glue only to the outer edge of the tissue and do not allow the glue to touch your impression. The glue is a water base and will cause your impression to fall if you apply any water to it.
Place your impression and write any greeting message either on the front, back or inside of your card.
You can make these as large or as small as you like. If you don’t have any really neat rubber stamps, you could use an impression from a crystal dish, vase, lamp, etc. Anywhere there is a definite and clear impression and there is no risk of water damage to the piece, there is a rubber stamp replacement.
Copyright © 1999-2024 Susan Spatone


Leave a Reply