Last updated on September 18th, 2015 at 11:34 pm
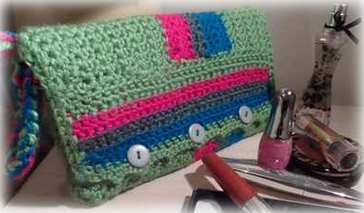 Crocheted Make Up Bag or Purse Pattern
Size: 5 ¾ deep x 9 ¼ wide
This practical crocheted makeup bag, or cosmetic bag, can also serve as a stylish clutch purse; all you need do is choose yarn colors for the purpose that you have in mind.
Materials:

- King Cole Chunky Knit Yarns: Petrol 552 (25 grams), Moss Green 548 (100 grams), Sea spray 557 (25 grams), Bright Pink 549 (25 grams). Or yarn of your choice
- 3 x ¾ inch buttons
- 4.5 and 3.00 mm aluminium hook or hook of your choice
- ½ metre of matching lining of your choice
- Matching thread
- Blunt embroidery/sewing needle
Difficulty: Intermediate
Abbreviations and stitches used:
– esc (extended single crochet)
– sl st (slip stich)
– ch (chain)
picot
PATTERN
BEGIN : with 4.5 hook and main colour, ch 35, 1 esc in 3rd st from hook, 1 esc in each st to end, ch 1, turn.
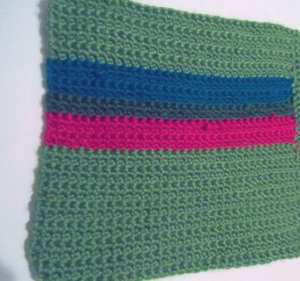
Row 2: Work 1 esc in st immediately after turning ch, 1 esc in each st to end of row, ch 1, turn.
Row 3-15: Repeat row 2. Join 2nd colour ch 1, turn.
Row 16-19; Repeat row 2,. Join 3rd colour, ch 1, turn.
Row 20-23; with 3rd colour n place, repeat row 2. Join 4th colour, ch 1 and turn.
Row 24-27; with 4th colour in place, work as for row 2. Re-join 1st colour, ch 1, and turn.
Row 28-33; Work 8 rows, as row 2. Fasten off and cut yarn. (35 rows in total)
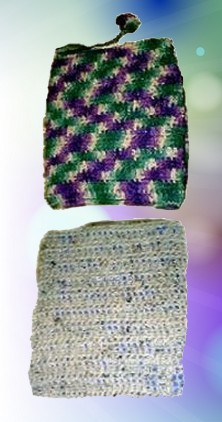
Work should look like the sample, shown above left, at this stage.
For button down flap
With right side facing upwards, turn work counter clockwise so stripes are now vertical. Join 1st colour to top right hand corner in 1st esc.
Work thus; carefully works 33 esc across this edge, ch1 and turn. Now work the following rows as row 2 of body.
3 rows in 1st colour
2 rows in 2nd colour
2 rows in 3rd colour
2 rows in 4th colour.
Now re-join 1st colour in last st and work I row of esc ch 1 and turn.
Next row for button hole
Work 1 esc in each of next 6 sts, ch 3, skip 2 sts,1 esc in each of next 7 sts, ch, 3, skip next 2 sts,1 esc in each of next 7 sts, ch, skip 2 sts, 1 esc in each of last of the remaining sts, ch 1 and turn.
Final row for this section; Work *1 esc in each of the next 7 sts, chain 3, sl st in first of ch3 (picot made) esc in ch 3 space,*. Repeat from * to * to end of row. Fasten off securely and cut yarn.
And cut leaving a 1 inch tail. You have just completed the back piece with button flap attached.
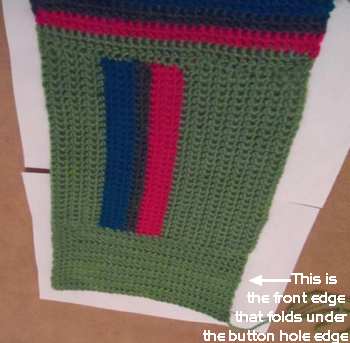
To work front side under flap, continue thus:
With right side facing, turn work upside down so the buttonhole edge is nearest to you and the other unfinished striped edge is away from you. Stripes are now in vertical position once more.
Continue – Re-join 1st colour to top right edge and work 33 esc across this edge, ch 1 and turn. Continue as row 2 of body for 15 rows.
Work should now look like the sample shown at left.
LINING
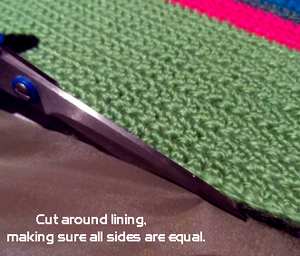
Lay work flat with wrong side up. Place work on top of lining. Cut around lining, making sure all sides are equal. Now put the cut lining right side up onto work which should be with wrong side up. (Wrong side onto wrong side)
Fold under and lightly press a ¼ of an inch of the lining all around.
Next, carefully use a sewing needle or pins to baste the lining to the bag piece. Now stitch edge all round with either hand or machine, being careful to sew just below the picot edge or you will block the button holes.
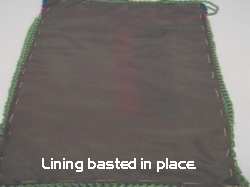
Piece now looks like this with based lining in place.
Below shows how the bag should look when folded for sewing side seams.
To complete your bag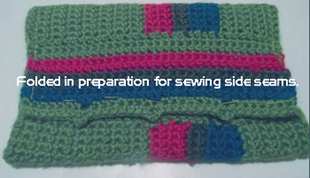
Fold work so the back with picot edge is folded over to front piece. Here the picot edge should just lie above the the row showing the vertical stripes.
Next, lift front flap backwards, and pin both corners of front piece at the top ready for sewing.
Sew sides together from the top down, securing sts at the beginning and end of each side.
Another way to join side seams is to attach mc yarn to top of side seam and work sc with 3.00mm hook, fasten off and tidy away any exposed yarn ends.
To sew on buttons, fold flap over to front and place a marker through each button holes. Sew buttons in place using matching thread.
Make tassel; Use any 3 of the 4 colours, leaving a 4 inch tail, ch 25, pull last chain tightly, leaving another 4 inch tail. Cut yarn; secure both ends with a slip knot close to the tie off at both ends. With right side of bag facing, use a safety pin to thread ties from inside out – top left hand corner. Now trim the tassel ends equal.
Your purse is now complete! Enjoy!
Machine wash inside out with mild soap at 30° to 40°. Dry flat, do not wring. No need to iron.
If you find any problems or have any queries with this pattern, please send me a message on my Etsy shop.
About the Author: Zigga Stuff is a crochet craft store selling unique items handmade in London. The ‘Crocheted Heaven’ blog displays some of the items featured at Zigga Stuff, along with other unseen projects or work in progress at crochetedheaven.blogspot.co.uk/ .


Leave a Reply