Last updated on November 9th, 2015 at 11:25 pm
Quick and Easy Beaded Christmas Tree Trims
by Jane Lake
Follow a very simple pattern and then vary the design with a simple twist of the wrist! You can make beaded Christmas ornaments that resemble gilded bird cages, crystal spirals and flowers.
Craft Supplies you will need:
- 3 chenille stems to make each Christmas ornament
- assorted beads – you can get very creative, depending on your selection of beads, but the beads must fit snugly and hold in place on the chenille stems
.
Directions for designs shown the bird cage, spiral seashell and flower ornaments are given below.
Take 3 chenille stems and bend each in half. You need to join all the stems together at this center point. Start with one stem and add the second one by twisting it at the half point bend to secure. Repeat with all stems and open them out like sun rays – you now have six separate stems to work with, all attached at the center.
Decide on the color of beads that you will use, and thread on to the first stem, adding beads until you are about 1″ from the end. Repeat with all six stems, following a pattern. All designs featured here used 18 beads on each of the six stems. This is where some creativity and a sense of color will be useful, because the designs can be infinite!
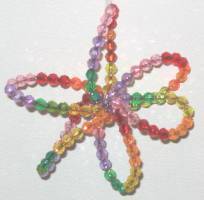
Rainbow Design for Bird Cage and Flower Bow: I threaded beads in groups of three, always following the same order…i.e. red, orange, yellow, green, mauve and pink. However, I moved the design up the stems by beginning with a different group of three on each stem. The first stem began with red beads, followed by orange etc., while the second stem began with orange, followed by yellow etc., and the third one began with yellow, then green…and so on, until all the stems were complete. When you are finished the last stem will end with the beginning color on the first stem that you completed.
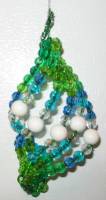
Green Seashell Design: Again, there are 18 beads, but on this design all the stems are threaded in the same pattern – five green, two blue, 1 crystal, 1 larger white bead, 1 crystal, two blue, and five green.
 For all designs: Bring the stems together and twist to secure at the top as shown. You can make a circle of these wires to add a hanging thread later.
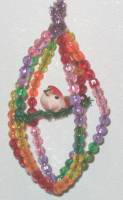
Bird Cage: Simply hold the ornament at the top and press it down against a table or your other hand, until the stems open up into a ball shape. Adjust the stems until you have a bird cage shape that you like. Take a piece of another chenille stem and glue a small bird in the center. Make sure the piece is long enough to span the bird cage and allow for extra at the ends to twist and fasten in place. Cut off any surplus.

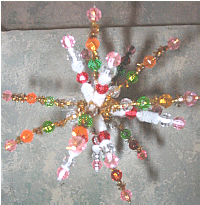
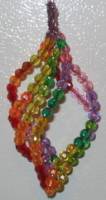 Spiral: The spiral is also the beginning of the bow and the seashells, although it looks very attractive as it is! To make the spiral, simply take both ends of your beaded ornament and twist tightly. Release. You can vary the spiral now by loosening it – just twist gently in the opposite direction until you get the effect you like.
The Seashell The Seashell ornament is a spiral that has been loosened off in both directions. The photo at right is an open spiral seashell design – you begin with the spiral, loosen it by twisting in the opposite direction, and at the same time push down on the top of the ornament to open it up still further while keeping the spiral “flow” – it creates a seashell shape.
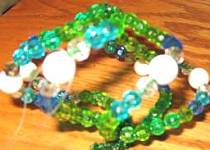 The green and blue seashell shown at left, and in the last photo at the top of the page, is created with exactly the same process, but when you first open the spiral to twist in the opposite direction, use your fingers to hold a group of three stems together at the top and another group of three stems together at the bottom, and then twist, pushing down the top as well.
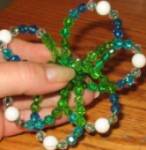 Bow or Flower Shape: This begins as a spiral, but open it like the bird cage – push down, gently twisting the spirals back open – the petal shapes begin to form, although the ornament is still in a ball shape, as in the left photo.
Use your fingers to squeeze bottom and top together, as shown – the flower bow is now shaped and you can see the completed design below.
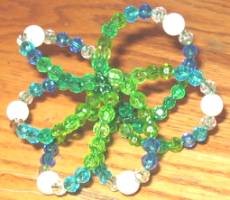 Experiment: Don’t worry if you get a design wrong the first time you try – reinforced with beads, the chenille stems are strong enough to take endless practice. The pictures shown in this article are the same two ornaments, photographed in different designs for illustration, and they still retain their shape in whatever design that I care to make. In fact, next year, you can have a whole new look to your Christmas ornaments – just open up the ornament you made and redesign it!
Leave a Reply