Last updated on January 21st, 2025 at 11:27 pm
How to Make Valentine Feather Angels
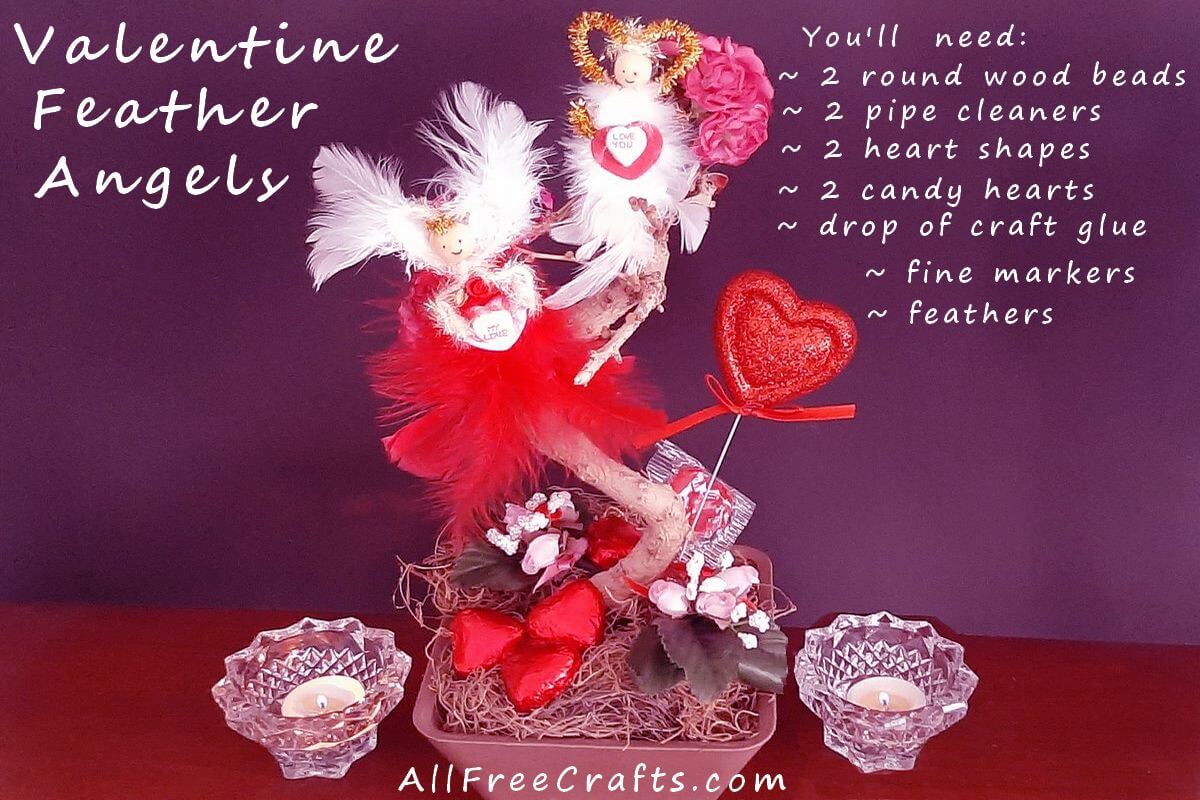
These homemade Valentine feather angels are quick and easy to make, feather-light, and make lovely Valentine gifts all on their own. I added mine to a bedraggled house plant that left behind an interesting stem which was perfect for angel perches. But if you add some fishing line or thin thread then you can easily hang these feather angels anywhere to float gently in the air.
You may also wish to see easy-to-make Wine Cork Valentine Angels or pretty little Recycled Pill Bottle Angels.
Craft Supplies for One Angel:
AllFreeCrafts is reader supported! Many supplies are found at thrift stores so try that first! However, if you buy from an affiliate link on this site, I earn a commission at no extra cost to you. As an Amazon associate, I earn from qualifying purchases. This has kept AllFreeCrafts.com online since 2002. Thank you!

- a round wooden beads for the angel’s head
- a pipe cleaner (chenille stem) preferably glitter or iridescent (Amazon)
- fine permanent markers in black and red for facial features
- fluffy craft feathers (Amazon link) the colors of your choice
- one thin, craft foam heart shape (Amazon link)
- a candy heart (or adhesive crystal or jewel) to add to the heart shape
- small amount of craft glue
- optional: tiny silk ribbon rose
You are most likely using purchased craft feathers for this project, but I always save any feathers that I find outside. My favorites so far are cardinal, bluejay and grouse feathers. If you do this too, here’s some basic information on identifying bird feathers. A Google search for the meanings of feathers will also reveal some interesting spiritual and cultural background on different types and colors of feathers.
Instructions for Feather Angels
Assemble the Beads and Pipe Cleaners
These instructions are illustrated in the photos in numbered steps so that you can easily see what to do. It’s super easy!
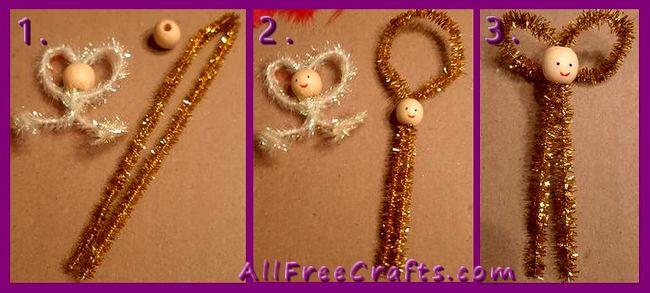
Step 1: Assemble your supplies and fold the pipe cleaner in half.
Step 2: Thread the folded end of the pipe cleaner through the wooden bead that you are using for the angel’s head. Thread it through at least halfway then form a circle above the wooden bead. Use fine permanent marker to make the facial features. I used a black marker and added two small dots as eyes. A small smile below that was added with fine red marker.
Adding the face now helps you orient the bead as you go through the rest of the angel assembly.
Step 3: Bend the top part of the circle down just below the wooden bead then bend up each side of the pipe cleaner to form heart-shaped wings, as shown, on either side of the angel’s head.
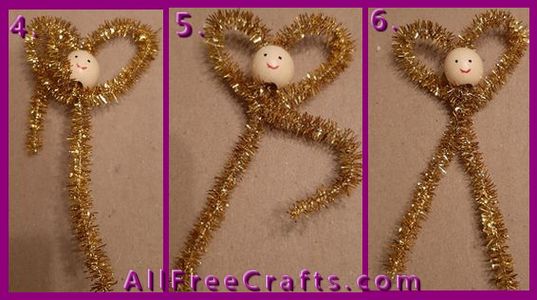
Step 4: Secure the shaped angel wings into place by bringing one leg up to the angel’s neck. Feed it through the bottom section of one of the wings, from front to back, as shown below.
Step 5: Pull the leg back down to where it was below the neck. Repeat Step 4 with the other leg.
Step 6: Twist both legs together tightly at the top and your angel figure should look like the one pictured in Step 5. The upper angel assembly is now secured so the pipe cleaner head and heart-shaped wings are fastened into place; now, there’s little chance of things coming apart or getting misaligned.
Add Angel Feathers
Step 7:
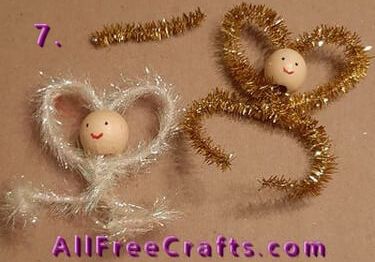
Here you can see how the “legs” in the previous steps are curved to make arms. I found they were a little too long for arms so I cut off a section and curled the ends to make hands.
If you do this, save the piece that you’ve cut off to use as a halo later on.
This wouldn’t be a Valentine Feather Angel without the feathers! Steps 8 and 9, pictured below, are fairly easy but you might experiment a bit with different sizes of craft feathers. Have fun with it and play around with fluffy feathers, or more refined feathers, and find a look which suits your Valentine angel!
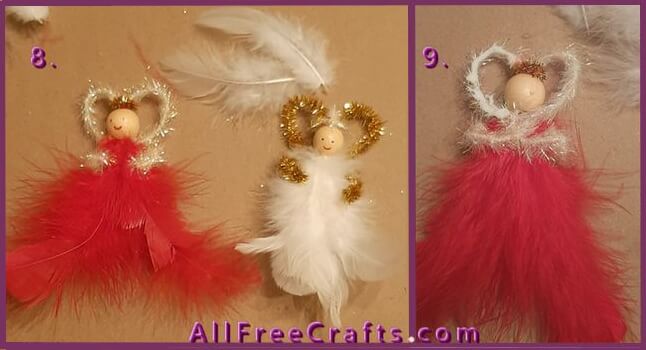

Step 8: Add feathers to your angel to form her dress. Simply choose feathers of a suitable size, or cut them down to fit, then insert the shaft of the bottom feathers into the lower hole of the wooden bead. I didn’t use glue for this step because my feathers were very tightly fitted. However, you can dab glue on the shaft tips before insertion to keep them securely in place.
Step 9: This photo shows a back view of the feather angel in progress. After the “dress” feathers are inserted, the back of your angel should look like this one.
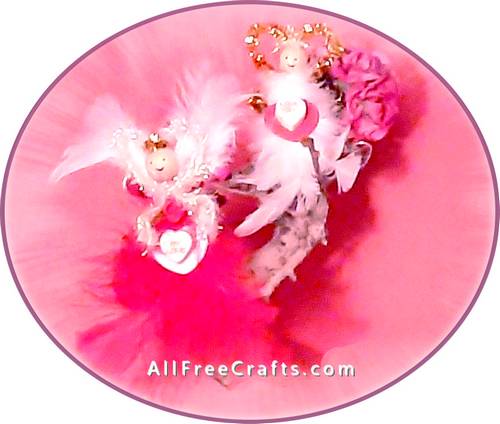
At this point, you can adjust the position and length of the arms to “hold” embellishments such as the craft foam heart shape that I used, topped by a candy heart, adhesive jewel or crystal.

Leave a Reply