 Angel Face Christmas Ornament
by Jane Lake and Twila Lenoir
Use a plastic doll head as the mold to make this darling angel face Christmas ornament. You can reuse the doll head to make several variations; use them to trim the Christmas tree, as shade pulls or curtain tiebacks, or as a wall decoration.
Angel Face Ornament
Supplies:
- Plaster of Paris
- Plastic doll head
- Off white paper twist
- Small rubber band
- Thin ribbon
- Silk flowers
- Artificial snow (or mix sand with white craft paint)
- Acrylic paints
- Sealer
- Felt
Angel Face
Craft Project Instructions:
Place the plastic doll with the face side placed down on top of a folded towel. This will support the mold in a flat positon as you work.
Following the directions on the plaster container, mix up the plaster and pour into the plastic doll head. Set the angel aside to dry overnight.
When dry, take some artificial snow (or a mixture of white paint and white sand) and apply it with a craft stick to the top of the doll head. This is to create a three-dimensional effect for the hair. Let dry. I have a gas oven so I put my doll face on a empty ribbon spool and popped it in the oven with just the pilot light on; it was dry in about an hour.
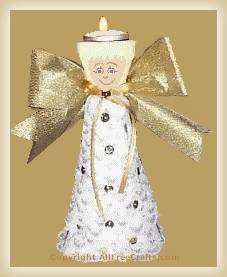
Lastly, unwrap about a half a yard of paper twist. Crunch it together in the center and secure with a small rubber band. Glue this to the middle front of the angel face, as shown in the photo. Cut the paper twist at the ends to look like wings. Finish by gluing on a pretty bow with some flowers in the center and your angel face ornament is done.
Tips:
~ Attach a piece of ribbon to the back as a hanger. Trace around the doll head on a piece of felt or paper; cut this out and glue in place to finish off the back.
~ Glue on doll’s hair, in place of the painted hair, for a softer look.Paint the skin tone, facial features and hair in the colors of your choice. Let the paint dry, then apply a protective coat of sealer.

Leave a Reply