Last updated on February 25th, 2021 at 07:56 pm
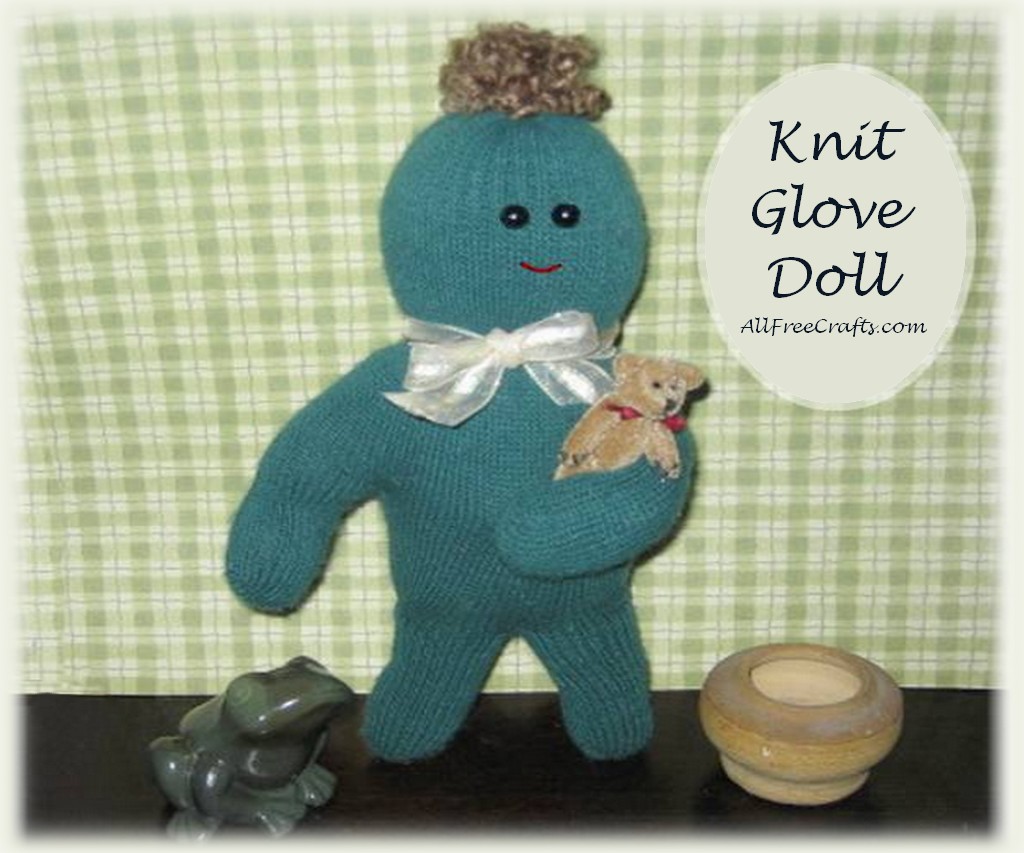
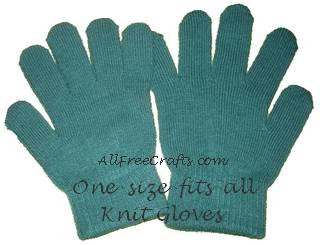
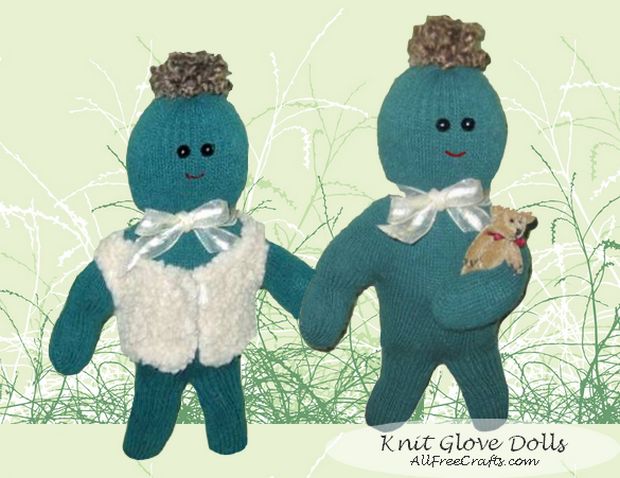
Learn how to make an adorable glove doll from a pair of one-size-fits-all, stretchy knit gloves. These gloves are really cheap, especially on sale, and come in lots of bright or neutral colors. The hand sewing is easy and, once you know how, you can make lots of these soft body dollies for the little children in your life or bazaar fundraising.
You Will Need:
- one pair of knit gloves
- needle and coordinating thread
- fibrefill stuffing
- 2 black beads for the eyes
- small piece of red embroidery floss for mouth
- doll hair or yarn
- half inch wide ribbon
- scissors
- Optional: small safety pin and tiny teddy bear
How to Make a Glove Doll – Instructions:
1. The wrist ribbing on these gloves is made of two layers. You must fold back the wrist area until you see where the edge of the ribbing has been sewn to the beginning of the ribbing inside the glove. Carefully insert scissors close to the sewn line and cut through one layer only, all around the glove, so that you can open the ribbing up to a longer single layer. Repeat with the second glove.
This long area of ribbing will form the head of the glove doll.
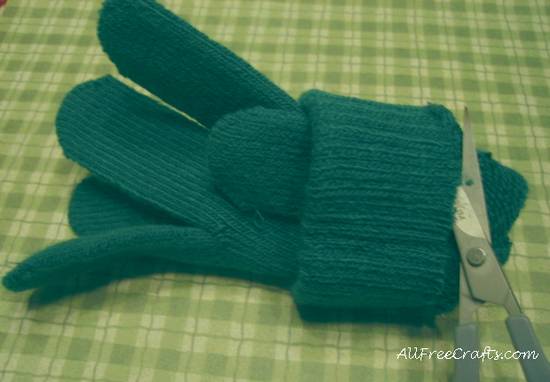
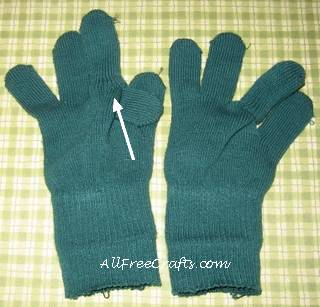
2. In this step the two middle fingers become the doll’s legs. Begin with the finger next to the thumb. Push the base of this finger into the middle finger beside it as indicated by the arrow in the photo.
Continue pushing until that finger is completely enclosed by the middle finger, as shown on the right of the photo, above.
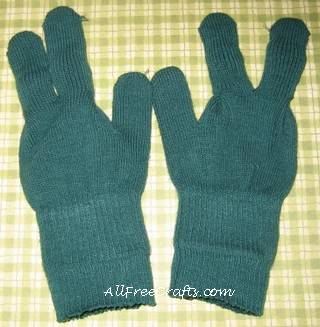
3. Do the same action with the little finger, pushing it all the way inside the middle finger beside it.
4. Repeat Steps 2 and 3 with the second glove. At this point, the gloves should look similar to the two-fingered pair shown above.
5. Next, you will create an arm hole in each glove to position the thumbs as the doll’s arms.
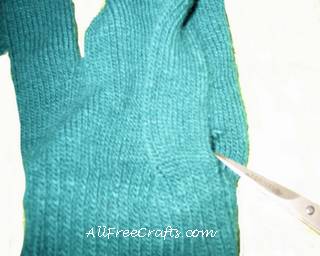
To do this, cut a small, half-inch slit in each glove, on the opposite side to the thumb, starting just above the wrist ribbing.
Put on one of the gloves, placing your thumb in the glove thumb and easing two fingers into the remaining two middle fingers (the doll’s legs) on the glove.
6. Now you must combine both gloves to make the doll body. Put the second glove onto your hand, over the first one, easing the thumb through the arm hole slit that you made in Step 5.
Poke around a little bit to work your fingers into both of the doll’s “legs”. This keeps everything matched up and easier to work with in the next steps.
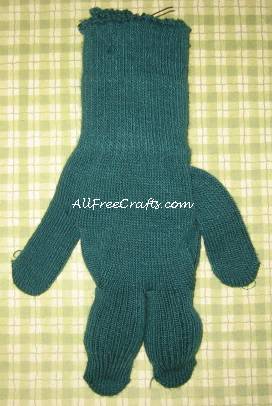
When everything is in position, carefully withdraw your hand and turn the combined gloves upside down. You now have a rather funny-looking but complete doll’s body, minus stuffing.
7. Stuff the doll with polyester fibrefill. Use a piece of dowel, or the handle of a wooden spoon, to evenly pack arms and legs. Experiment a bit with the stuffing to sculpt and shape the doll; less stuffing makes the doll leaner, but also less sturdy. Plump stuffing provides a firm body which is easier to position or pose. Take a minute to marvel at how stretchy and accommodating these one-size-fits-all gloves really are!
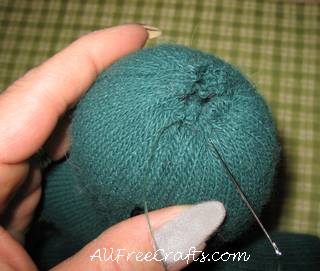
8. Fill the doll with stuffing up to the neck, then thread a needle with coordinating thread. Beginning and ending at the back of the doll’s neck, sew a running stitch all around, leaving long thread ends at the start and finish. Cut thread. Hold on to the beginning thread and pull on the ending thread, using your fingers to draw up the neck evenly all around.
Once you are satisfied with the neck size and shape, tie off the threads together to secure the neck.
Also sew up the arm hole opening that you made to fit the thumb through. This is to prevent the cut slit from unraveling under the pressure of the stuffing.
9. Add more stuffing to the doll’s head, pushing against it with your fingers, shaping the stuffing evenly all around the head in a round ball shape.
Sew a running stitch all around the edge of the fabric then draw it closed, ending with a few more stitches at the top to secure it.
10. Guess what? You just created a knit glove doll! Now you can add the face, hair and other details which make the doll’s personality. This is where your doll becomes a girl or a boy and starts to take on a unique personality.
Add the Doll’s Face and Hair
Hand sew two small black beads in the center of the doll’s face as eyes.
Thread needle with embroidery floss and use outline stitch to sew on a small smile.
Make a tufted mop of hair by winding curly yarn around the tips of two fingers about ten times, as if making a pompom. Remove circles from your fingers. Thread a needle with coordinating sewing thread and pass it through the yarn circles, then make a stitch or two to hold the circle together at a single point. Sew this area securely to the very top of the doll’s head and fluff out the yarn. Alternatively, sew a small bunch of fake curly doll’s hair in this position.
Tie a ribbon around the neck and end in a small bow.
If you want the doll to cuddle a little teddy bear, as I did, then fasten one arm to the center of the stomach area with a hidden safety pin. Tuck the teddy bear in the crook of the doll’s arm.


Yvonne Whiejy says
I think this glove doll is just to cute .Do you have a printed friendly pattern of it’
Jane Lake says
Hi, Ynvonne,
If the social media bar is showing at the left side of the page, click on the bottom Plus sign button. From there you can select Print, or PrintFriendly or other options.