Last updated on September 27th, 2015 at 01:59 am
How to Make a Portable Solar Lights Board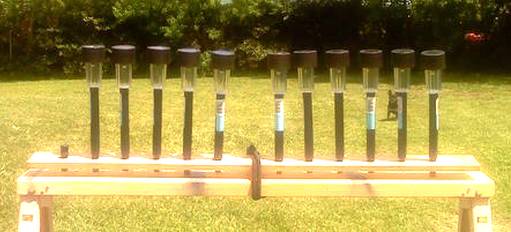
by Jane Lake
Photos and design courtesy of Da Paper Ladies, a member of the WasteNothing recycling group.
This is a simple project to make a portable board of garden solar lights that can be brought indoors, as a source of emergency lighting whenever the power goes out, or simply to provide a regular source of light for dark hallways, living areas, sheds, or garages.
What You Will Need:
- Sunlight (at least 6 hours per day is preferable)
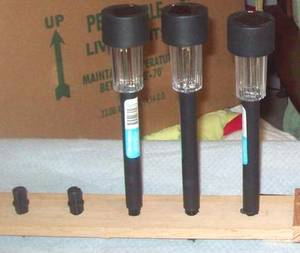
- spiked garden solar lights
- one narrow wooden board, long enough to fit as many solar lights as you wish to use
- drill and drill bit
- rubber mallet
- hack saw
- measuring tape
- pencil
Optional:
- 3/4″ pipe clamps to make handy indoor mounting brackets for the lights (these looks like an upside down “U” with tabs on both ends for nails or screws)
- small blocks of wood to mount beneath the board as stabilizers and/or legs
- screws or nails
- portable saw horse and small bungee cord
.

Project Instructions:
Garden Solar lights are available at most department stores and garden centres, in a wide variety of designs and power settings. Even the most inexpensive fixtures can be used for this project, although it is best to select a narrow design with plain lighting panels, rather than those molded to refract the light in a starburst effect across walkways.
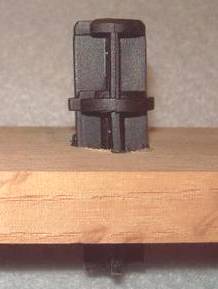
Prepare the board by doing a test placement with two of the solar lights to determine how far apart they must be. Use this measurement to mark the position of all the holes that will be needed along the length of the wood.
Drill the holes, making each hole just a little smaller than the top diameter of the ground spikes that come with the lights.
Put a spike into each hole and pound gently into place with a rubber mallet. It should be a nice tight fit, leaving about an inch or so of each spike sitting above the board.
Saw off the part of each spike that hangs below the board.
Mounting the Solar Board Outside
There are numerous ways to position the solar board for charging, so consider the options available to you and adjust the design accordingly.
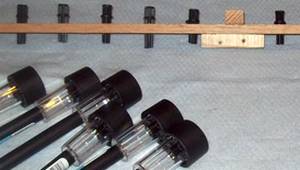 If you leave a small part of each spike protruding beneath the board (as shown in this sample), then you will also need to cut some blocks of wood to mount beneath the board. These will provide space for the bottom part of the stakes and help stabilize the board. Screw or nail the blocks into place – just in the centre of the board, as shown, or on either end as well for extra stability.
Fit all the solar lights in place, then move the board outside to a sunny spot. As you can see, the sample is securely fastened to a portable saw horse with a bungee cord, an arrangement which is very stable yet easy to move if necessary.
You now have a nice platform for charging the lights during the day yet easily carrying the whole thing in at night. During an emergency power outage – or every evening if you wish – you can simply remove the board of fitted lights and move it to wherever you want it.
Using the Garden Solar Lights Indoors
These portable light solar lights make perfect little nightlights. High brightness models emit an amazing amount of light.
Pipe Clamp Mounts
“U” shaped pipe clamps can be fastened in strategic places – such as the hall, bathroom, near the kitchen sink or beside entry doors. Slip one of the solar lights into each clip for emergency lighting during power outages, or a convenient source of green energy night lighting whenever you want it.
Before permanently mounting the clips, wait until night time, turn out the regular lights, and experiment with positioning. If the clips are no higher than three feet, for instance, they should light up the “walk zone” in hallways. Other clips can be used to focus light over the kitchen or bathroom sinks or near the keyholes of entry doors.
Portable Supports
Single stem flower vases of sufficient weight are usually able to support a single solar light and can be carried where needed. Tall stemware or drinking glasses may also serve. To prevent the vase or glass from falling over, insert the solar light, then add pebbles or glass marbles around the stem for weight and extra stability.


Leave a Reply