Last updated on April 4th, 2025 at 01:04 pm
How to make raised floral impressions for framing with a simple base of toilet tissue. Use a favourite rubber stamp to create the raised impression then paint and frame.
Craft Supplies:
- Toilet Tissue
- Rubber Stamp
- Acrylic Paints – please note that crayons, markers or coloured pencils will work too, but you will need to be a little more careful when using these types of colouring options
- Suitable sized frame for your impression
- Towel
Paper projects can be so satisfying! Some editor’s favourites here:
Craft Instructions:
To make the picture centre you will need toilet tissue. Layer eight sheets of two-ply tissue, one on top of the other.
You can make these using less or more tissue, depending on the effect you would like to achieve, but start with eight sheets to begin with. If your tissue is on-ply, use 16 sheets instead of eight.
You will need a flat clean working surface for this craft and the best place is your kitchen counter top. Working near the kitchen sink will make your job easier. Take your layer of eight sheets of tissue and saturate them with water. Gently press a little of the water out of the tissue (press against the side of the sink or a bowl). This helps to compress the tissue together.
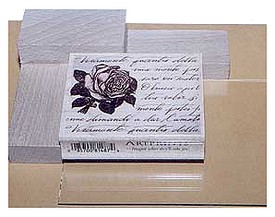
Place your rubber stamp with the stamp facing up and place your saturated tissue on top of the rubber stamp imprint. With your fingers, gently press the tissue into the stamp design.
Once your tissue has a good impression, place a towel over the tissue and press with the palm of your hand to remove access water from the tissue. Move the towel and press again until no more water transfers to the towel.
Gently peel the tissue away from the stamp and set aside to dry. These impressions must be completely dry before you continue. Disturbing your impressions, while they are drying may damage the impression, so don’t disturb them during the drying process.
Now that your impressions are dry, using acrylic paints, colour in the design of your rubber stamp impression. Do not apply a lot of pressure when colouring your design. You can colour the entire design or just add a little colour to specific areas of your impression. It’s important that very little paint be applied at one time. Dip your paint brush in the paint and then wipe away the excess on a paper towel. Using an almost dry brush, paint the colour onto the paper. Too much moisture will cause your impression to flatten.
You can make these as large or as small as you like. If you don’t have any really neat rubber stamps, you could use an impression from a crystal dish, vase, lamp, etc. Anywhere there is a definite and clear impression and there is no risk of water damage to the piece, there is a rubber stamp replacement.
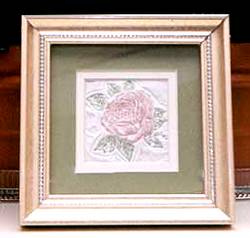
Place your impression in a frame and you are all done.
This frame is about seven inches square and the photo cannot show how truly pretty these are. A grouping of these will look magnificent on a small wall.
Copyright © 1999-2024 Susan Spatone All rights reserved.

Leave a Reply