Last updated on December 26th, 2015 at 12:40 am
 How to Make a Braided Clothes Hanger using Recycled Plastic Bags
by Jane Lake
Cut plastic bags into loops, join the loops and use to braid around a plastic clothes hanger. The resulting braided clothes hanger looks attractive – and clothes won’t slip off!
Supplies:
- plastic clothes hanger
- approximately four plastic shopping bags
- scissors
Project Instructions:
1. Prepare a supply of plastic loops. Cut the bottom off the first bag and discard this piece. Cut straight across, two inches from the new bottom edge, to make your first loop. Repeat until you get to the top area of the bag. Discard the part with handles.
2. Join five loops together to make the first plastic string. This is done in the same way that children make strings of elastic bands. To join loops, thread the top of one loop through the bottom of another loop. Catch the bottom of the loop being attached and thread it back through the top of the same loop, pulling the resulting knot together. Make two strings of contrasting colors, each five loops long. You will add more loops as the work proceeds, as required.![]()
3. To begin braiding, use two plastic strings which, for this project, we will call white and yellow. Find the middle of both strings and place one string across the other one at the center so that, if the strings were stretched out, they would make a cross shape overlapping in the middle. Pinch the overlapping center of the strings between your fingers.
4. Hold the clothes hanger with your knees, with the hook pointing away from you. Hold the overlapping center of the strings firmly against the tip of the hook, so that two white strings fall on the left of the hanger and two yellow strings fall on the right.
5. Push the top right yellow string under the hanger so that it goes between the two white strings on the left. Bring this yellow string over the top of the hanger to the right, so it is now the bottom right string. Take the top left white string and pass it under the hanger so that it goes between the two yellow strings on the right. Bring this white string over the hanger and back to the left, so it is now the bottom left string. Repeat this pattern all the way around the hanger, adding loops to your strings as needed.
6. Braiding around the curves may be easier if you temporarily push the braided part back a little, continuing the braid until it can be pushed around the curve.
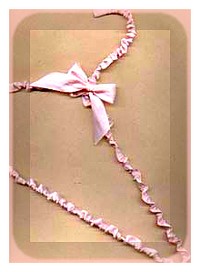
7. When you get back to the base of the hook, knot off the strings. If desired, embellish the hanger with a ribbon or sachet.
Suggestions:
– To use wire coat hangers instead of plastic, simply tape two wire coat hangers together and use as one hanger.
– You can substitute panty hose, or lengths of non-fraying fabric, for the plastic strings.
– Get different effects by varying the colors of the strings. Two-tone braids are interesting, but so is a single color, although single colors are harder to do when you are first learning this technique.


sk says
Great instructions. Was able to repair my sister in law’s hangar made with the old fashioned phentex! Will try plastic bags !!!!
Jane Lake says
My first braided hangers were made with Phentex too, although I’d forgot the name of it – thanks for the reminder! Am so glad this was helpful to you.
Susara says
Could you do a video please, the instructions are a little confusing:-)