Last updated on October 31st, 2015 at 12:01 am
Recycle juice can lids and old Christmas cards into three dimensional Christmas tree ornaments.
By Jane Lake
Save your juice lids and old Christmas cards to make lots of these beautiful tree trims. Great for trimming the tree or for kids to make and give as gifts – and good for our environment too.
You Will Need:
- juice can lids
- old Christmas cards
- tacky glue or white glue
- paper twist
- thin ribbon for a hanger
- fine pointed scissors
- optional – lace trim and a felt circle backing, hot glue (adults only) to attach lace
Craft Instructions
1. Select cards with a primary image that fits roughly half the space on the juice can lid, plus a background circle that fits inside the lid completely. Sometimes, if the colors work well and the subjects complement each other, you can use a circle from one Christmas card and an image from another. Cut out the circle and glue it to the front of the juice can lid.
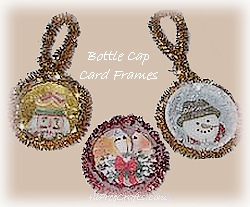
2. Cut paper twist to fit around the juice lid and glue it just inside the rim, beginning and ending at the top.
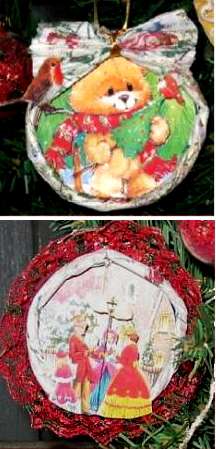
3. Choose a primary image with features that can be used to add three dimensional effect. In our first ornament, these features are the lamp post, and the fence to the right of the carol singers. On the teddy picture, both robins and the teddy’s scarf are three dimensional. Carefully cut out your image.
4. If part of the image is very thin, like the lamp post in our first example, strengthen it by gluing on a small sliver of card, or even part of a toothpick, at the back.
5. Make a trial run. Place the image on top of the circle background, and decide what features will be three dimensional. The fence, in our first example, was cut a little longer than was needed to fit, then bent at the end and glued to the edge of the paper twist. The ladies skirt was allowed to extend onto the paper twist and glued in place there. The lamp post was not glued down at all. A small hinge of bent card is glued behind the little girl, attaching her skirt to the background but allowing it to stand out as a dimensional form.
On the second ornament, teddy is heading home from the forest with his Christmas tree. His right paw is glued forward, on the paper twist, although his left is glued to the background, giving the impression of walking. The robins were carefully cut, but the larger one came unattached – it was just glued in place on top of the paper twist, with the tip of the branch it is perched on glued back near its original spot. The scarf ends were folded out and left unglued. Both of teddy’s hands were folded outwards, in a slight curve, just enough to provide dimension to his body and depth to the ornament.
Once you’re satisfied with your arrangement, glue it down, using small dots of glue in several places. If required, glue on a small piece of cardboard or paper bent into a hinge to push out areas that need this support.
6. Cut a small rectangle of paper twist and open it out. Pinch the middle, and tie with thin ribbon to make a bow. Use the ribbon as a hanger. If your design doesn’t include the paper twist bow, just glue the ribbon on the back as a hanger.
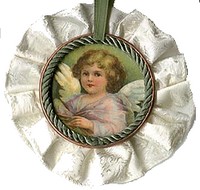
7. If you are using pregathered lace trim, glue it around the back of the lid, beginning and ending at the top. Allow enough fullness that the lace doesn’t tend to curl inwards. Hot glue is easier for this, but tacky glue or white glue also works.
8. If desired, cut out a circle of felt, wrapping paper or scrap fabric and glue in place as a backing.


Leave a Reply