Last updated on December 26th, 2015 at 12:18 am
Ribbon Spool Boxes
I was so impressed when I first saw this original recycling craft project by Loretta Wood that I had to ask her permission to feature the project on this site.
The creative use of ribbon spools in making these decorative trinket boxes is imaginative recycling at its best.
by Loretta Wood
Supplies:
- Empty spools, any size; wide spools for the box, narrow spools for the lid.
- Plain card stock saved from purchases with one side clean and preferably white.
- Felt of contrasting color. The peel and stick comes in green, red and black.
- Pretty craft papers
- Dressy shank style button, if they come on a card with a clip you can use this.
- Glue stick, I used BOND-fast it has a better hold.
- Aleens ClearGel Tacky Glue.
.
Project Instructions:
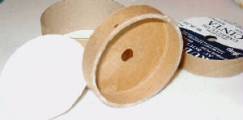
Choose 2 spools of the same diameter, one narrow and one wide. This photo shows how the side is trimmed close to the edge of the spool and the card cut to fit the side.
For the bottom, remove one side of spool. Trim other side even with edge of spool. Clean all glue residue from the open side of spool to make a smooth edge. Cut a circle to fit the bottom of the box from the card stock, glue to bottom with the white side out. This is now the bottom of the box. Cut a circle from the felt to fit the inside bottom of the box, glue in place.
Measure the inside depth of the box and cut a length of felt just a tad narrower than the depth so when you make the lid the felt will fit inside, you want a tiny bit of the box to show around the top edge of box. Cut the length to where the ends meet, not overlap. Glue in place.
Cut a length of paper the width of the box and cut to fit with a slight overlap, glue in place. The bottom is finished. If you cant find card stock with the polished finish like what comes as packaging, cover the card stock bottom with felt or matching paper. The main reason for the card paper is to not only cover the hole but to give extra support.
For the top, remove one side as with the bottom, trim the side and cut a circle to fit and glue it on. Cover the top with pretty paper, punch a tiny hole and insert the button shank and if you have it slip on the clip put a dab of glue on button shank and clip. When dry glue the side back on and trim to edge, cut a circle from the card and glue on. Cut a circle of felt to fit just inside not to the edge of the lid and glue on the bottom side of the lid, it should fit inside the bottom just enough to be snug. Cut a strip of paper the width of the lid and glue on with just a bit of overlap.
You can use a regular button if you don’t have the kind with the shank. The fancy gaudy buttons look great with a floral print.
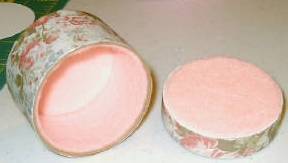 You could also use bedspread cotton thread spools, they don’t have the sides but it would be easy to cut a circle from heavy card stock and attach to make a box. I have also got a salt box and cut in half, it will make 2 box bottoms.
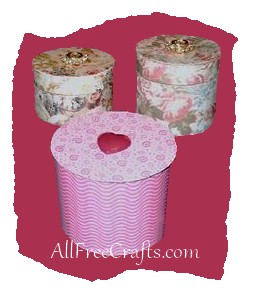
These photos show the clip being used, on this box I left the lid open and so it rests on the bottom.
The closed ones fit into the bottom when you trim the felt just a little smaller. 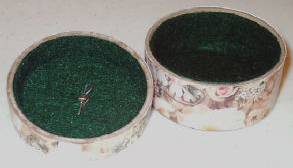
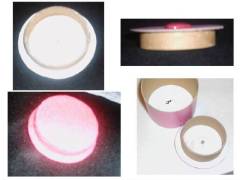
On the pink box I used a peel & stick paper I found, it was half wavy and half swirls it looks cute being in the same colors. The heart is a shank button.
This lid I made with a much smaller spool since I didn’t have any near the diameter of the bottom. I cut a circle from the card the size of the box and glued it on the side of the spool, which was the same size as the inside of the box – now it sits flush on the edge.
I covered the inside of the lid with a circle cut from the card. The lip is covered with a very narrow strip of felt carefully glued around the lip. The spool edge is covered with 2 strips of felt to fit snug.




Leave a Reply