Last updated on January 10th, 2026 at 06:45 pm
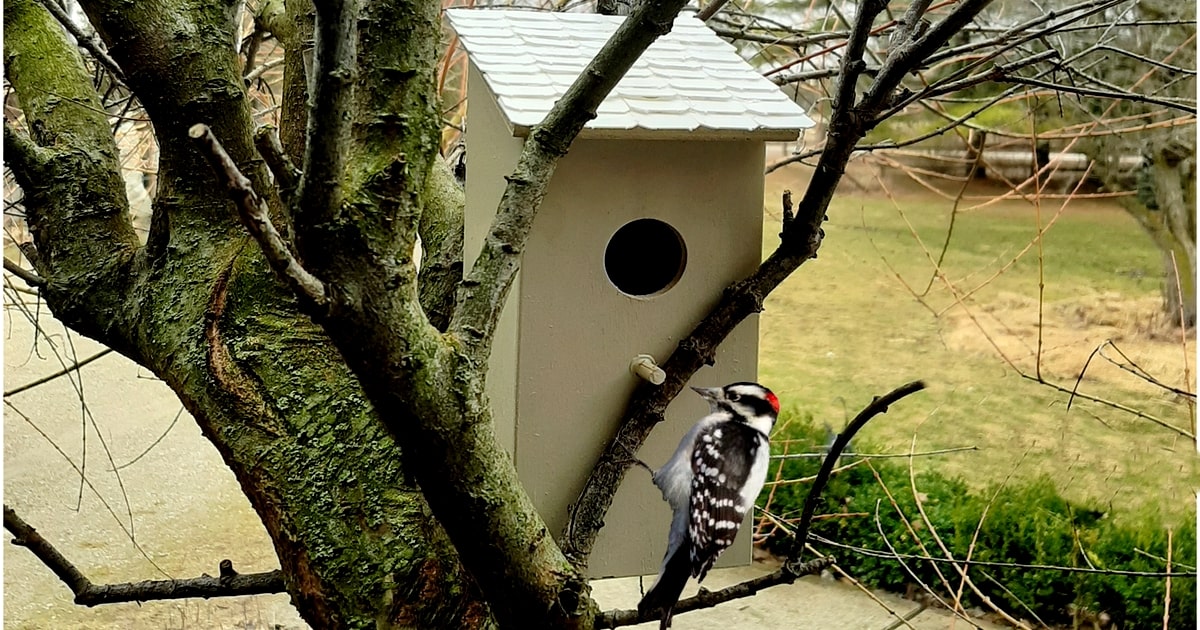
Reuse plastic bread tags to create a strong, weatherproof roof for a wooden bird house. The overlapping tiles made by the bread tags repel rain, just like the tiled roof on your own house, shielding the underlying wood from damage.
A leaky roof in a bird house leaves the poor baby birds drenched in water every time it rains, wetting the entire wooden structure and promoting mould. At the very least, it compromises the roof wood, allowing leaks and saturating the wood over time. This layered bread clip roof solves those problems while recycling a common plastic throwaway item.
DIY Bread Tag Bird House Roof
You Will Need:
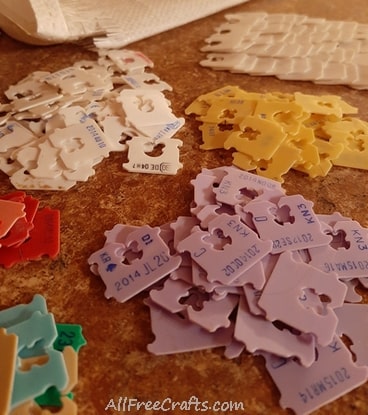
- lots of plastic bread tags. I used about 50 bread tags to make my bird house roof.
- wooden bird house with a slanting wooden roof
- weatherproof transparent outdoor glue or caulking
- non-toxic exterior latex paint
- paint brushes
- measuring tape
- scissors
Step One: Calculate the number of bread ties.
Measure the width and length of your bird house roof and add 1/2 an inch to each dimension.
For example, if the roof panel is 6 inches wide, you want your bread tag tiles to measure 6-1/2 inches across, allowing about 1/4 inch overhang on each side.
Lay out the bread clips on a flat surface to determine how many rows of bread tag tiles that you will need to cover the roof completely.
Step Two: Applying Paint and Weatherproof Glue
Apply at least two coats of non-toxic exterior latex paint to all outside surfaces of the bird house. Let the paint dry.
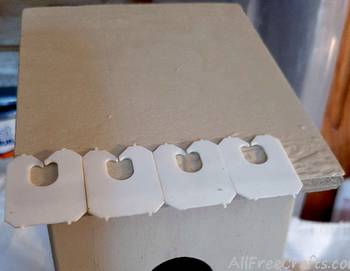
Apply a generous line of weatherproof transparent exterior glue or caulking to the bottom area of the roof panel.
Set the bottom row of bread tags into the glue. Let the front and sides of the tiles overhang the roof by about a 1/4 inch.
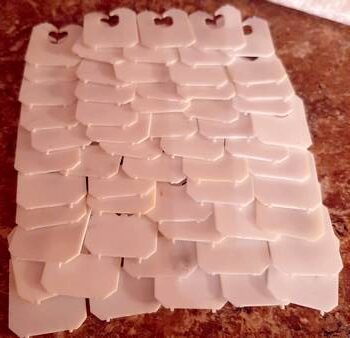
Step Three: Applying Rows of Bread Ties to the Roof Panel
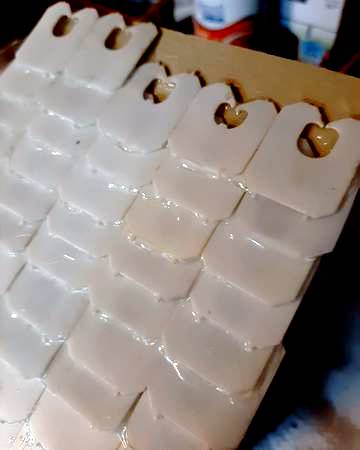
Continue applying generous lines of glue and embedding rows of bread ties.
Check the photo closely. Each row of bread clips covers the holes and the “opening” sections of the bread clips on the row below.
As well, each bread tie is deliberately positioned so that it does NOT align precisely with the bread tag on the row below it. They overlap on purpose to increase the weatherproofing effect.
You can easily see the glue spilling out from the bottom of each bread row tie. Let it be.
Step Four: Completing the Final Row of Bread Ties
For the top row, you’ll need to cut down the bread ties with scissors, making them just large enough to cover the holes and open sections of the row below.
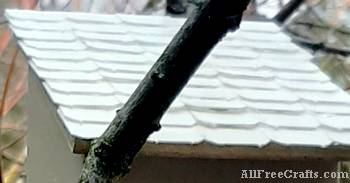
This completes the weatherproofing and finishes the bread tile roof.
Finding the Pefect Home for Your Bird House with a Weatherproof Bread Tie Roof
At this point, you have a painted wooden bird house with a weatherproof roof made from reycled bread ties. Now, you need to find the perfect place to put it.
Where you should hang your bird house depends on the size, hole dimensions, hole position above the base, and other variables. Check: Make the Right Birdhouse to determine where you should position your new bird house and what kinds of bird it will attract. Only cavity nesting birds use a bird box, and each species has a different requirement for the size of the bird house, the height it is positioned above ground, and even the size of the bird hole and the height it is positioned above the base.
See also: Feeding Wild Birds Safely with Food Scraps, Decoupage Bird House, Eggshell Bird House and How to Make a Woodpecker Box.
For more ideas of recycling bread tags, see Reuse-Recycle Bread Tags on Pinterest.


Leave a Reply