Last updated on April 19th, 2024 at 09:12 pm
How to Make Curtains in an Evening
Make a simple pair of curtains for one window in about an hour; make matching sets for your whole apartment in an evening. Sewing instructions are given here in detail, but if you don’t have a sewing machine, there is a no-sew version of the drapes as well.
You Will Need:
- Fabric
- Measuring tape
- Scissors
- Iron and ironing board
- 1/2″ or 5/8″ roll of fusible web such as Stitch Witchery.
- Curtain clip-rings. These should be readily available in any store that sells curtain rods, or check Amazon for a wide variety of Drapery Clip Rings
in various sizes.
- For the sewn curtains, you will also need: needle, thread, sewing machine.

Step 1: Decide the size of each curtain panel.
Length: To find the length, measure from where the top of the curtain will hang from its hooks (This will likely be about 1½ inches below the curtain rod), down to the window sill. Add two inches to this measurement for the 1″ hem allowance at top and bottom. This is your minimum length.
Most drapes look better when the bottom edge falls below the window sill, so lets add some “design ease.” The sample curtains shown hangs about 2″ below the window sill, but could easily be made longer.
To recap – take the measurement from just below the rod to the sill, add two inches, then add your desired length below the sill. This is your length measurement.
Width: Curtains need a certain fullness to drape properly in front of the window. In the sample curtain, the window is 58″ inches wide. Two side-by-side curtain panels cover it, each being 45″ wide, providing a total curtain width of 90″ – so just over 1.5 times the window width.
Since you are already adding extra width, you usually won’t need to add hem allowances as well, unless you need exact dimensions.
Shortcut Tip: By buying fabric that is already the width that you want, the only measurement you will need is the length.
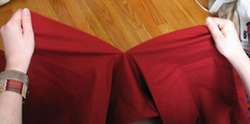
Step 2: Cut out your curtain fabric. Often, you can tear the fabric along the cross-wise grain for an accurate, nicely squared edge. First, make sure the top edge of the fabric is even. If not, cut a new, even edge at the top before proceeding.
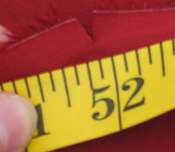
Run a tape measure down the selvedge edge of the fabric and make a little snip at your length measurement with the scissors. Gently tug the fabric to see if it will tear evenly. If so, pull firmly on each side until the fabric is torn completely across from side to side.
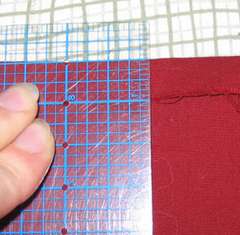
If ripping like this won’t work, cut across the fabric with scissors or, if you have one, a rotary cutter.
Step 3: With the fabric wrong side up, begin folding a 1/2 inch of fabric along one of the side edges, folding from the right side of the fabric to the wrong side, as shown.

Press the folded edge. Continue ironing along the whole edge.
Most professional sewers would insist that you cut off the selvage before proceeding, because it will hang differently than the rest of the fabric. However, this hasn’t been an issue in my experience with these curtains.
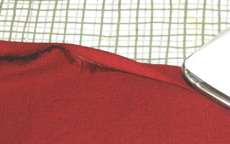
Step 4: Fold the edge over once more and press. The raw edge/selvage edge should be completely tucked under.
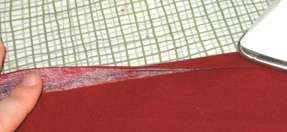
Step 5: Cut a length of stitch witchery or fusible web strip equal to the length of the edge you’re working on. Tuck it under the fold you made in step 4. Fuse it in place following the instructions on its packaging.

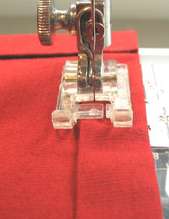
Repeat steps 3 and 4 for the edge of the other side. Then repeat on the top and bottom edge.
Take care when pressing the corners when you “hem” the top and bottom. You want the corners to make a nice right angle.
No-sew version: skip down to step 12.
No-sew disclaimer: while fusible web will hold your hem, it is very delicate to wash and will wear out faster than stitching. So, if you’ve never sewn before, this is a great project to get started! You can even do the sewing by hand if you don’t access to a sewing machine.

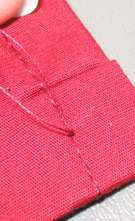
Step 6: Sew the hem down. Because you fused your hem in place, it should sew up very nicely without any shifting of the fabric.
At the start and end of each line of stitching, backstitch a new times to secure the thread ends. Then, working on the wrong side, gently tug on the end of the loose thread. A loop should form from the thread end on the other side.
Pull the loose thread end from the front side to the back. Knot the two threads and clip off the excess.
Steps 8-11 are for the ties. If you are making curtains without the ties, skip to step 12.
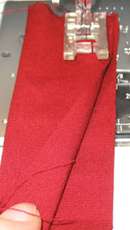
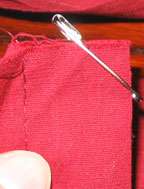
Step 7: Decide the width of your ties. Don’t make them more narrow than 1/2″ or they will be difficult to turn. The width of the fabric you need is 2x the tie width + 1″ (1/2″seam allowance on each side). The ties in the sample are 1″ wide (3″ wide strip of fabric). The recommended tie length is 36″.
After cutting out fabric for your ties (1 tie per curtain), fold each one in half, right sides together, and sew it 1/2″ from the raw edge to make a tube.
Step 8: Clip a safety pin to one edge.
Dive the safety pin into the fabric tube. Work the fabric along the safety pin to turn the tube inside out.
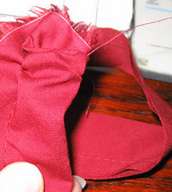
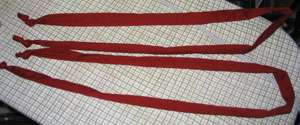
After you turn it right side out, remove the safety pin and press if desired.
Step 9: Finish the ends of the tie. A single knot is functional and simple. You could also tuck the raw edges into the tube and hand sew or topstitch the end closed.
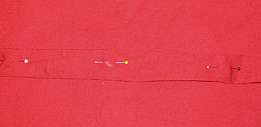
Step 10: Pin the center of the tie to the center of the curtain. The tie should be positioned so it will be running horizontally when the curtains are hung.
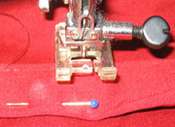

Step 11: Stitch the tie to the curtain with a square pattern. To make nice corners, put the needle in the down position, raise the presser foot, pivot the fabric, and lower the presser foot. Then raise the needle and continue stitching. (Be sure the presser foot is lowered before you begin stitching or your threads will tangle and your machine will jam!)

Get the excess thread to the back of the curtain, either by gently tugging on the bobbins threads or pulling them through with a needle. Tie the ends in a knot at the back of the curtain and clip off the excess thread.
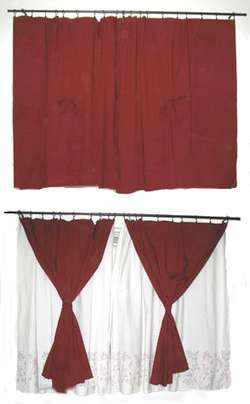
Step 12: Clip on the curtains rings. You can make a two-layer curtain like in the sample by making another curtain out of complementary fabric and clipping the two layers together with the same clip-rings.
To get a nice bow, first make a simple knot with the tie so that the ends are now opposed vertically rather than horizonally, then tie the bow. If you don’t make the knot first, your bow will be sideways.

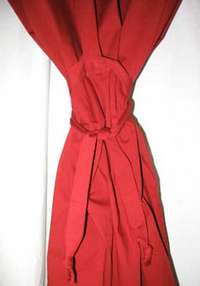
In the two layered curtain, the ties can be tied in a bow when the upper curtain is in use. Or wrapped around the upper curtain to tie it back when you want to let more light into the room.
Based on How to Make Curtains, previously released under Creative Commons License by SavvySeams. Also see Sew Simple Curtains and a Valance and, for design ideas, check out Decorating With Sheets.



Leave a Reply