Last updated on March 15th, 2024 at 09:35 pm

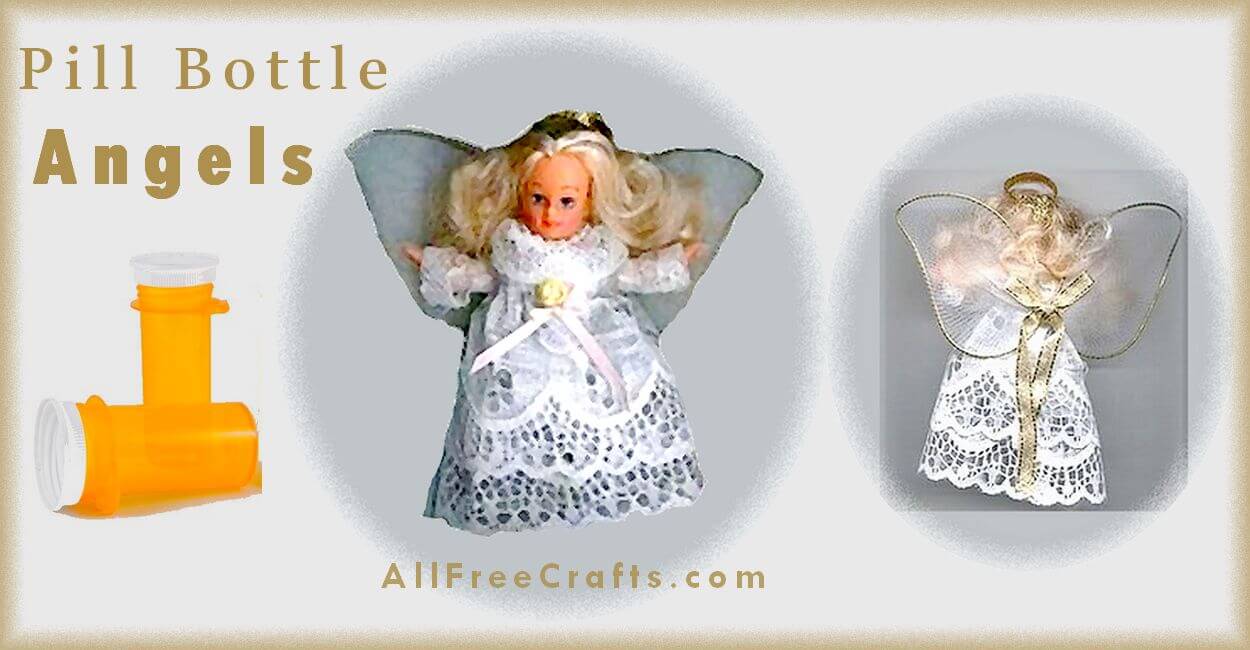
I have two different versions of pill bottle angels. Directions for both appear on this page. Originally, both of these angels had a film canister base but those are now hard to find.

The good news is that plastic pill bottles, which we all collect, are a perfect subsitute as the base for either of these adorable angels.
Recycle your pill bottles and make whichever little angel flutters your heart. For angels of a similar size, also using recycled materials, please see my Wine Cork Angels.
How to Make a Pill Bottle Angel

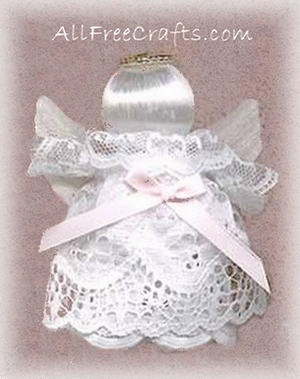
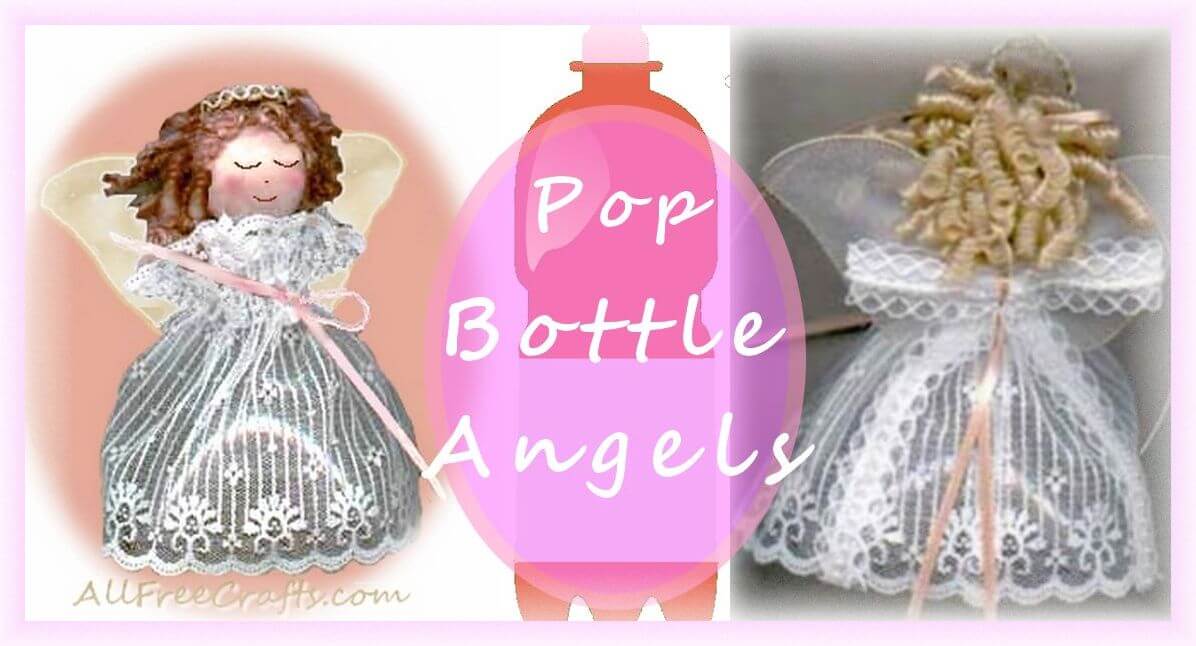
Recycle a pill bottle and a little lace to make this sweet angel ornament. Please refer to the photos for visual help as you make this project.
If your container is white then proceed with the following instructions. However, if your pill bottle is another color (that will show through the lace) just glue on a piece of white fabric to cover the bottle or disguise it with a coat of white paint.
If you have more pill bottles for recycling, PlEASE SEE How to Make Pill Bottle SnowmEn OR this PRETTY Pill Bottle Valentine Keepsake.
Supplies:
- Empty pill bottle (or film canister)
- Scrap lace (gathered)
- Ribbon
- Angel Wings
- Doll face and hands
- Small ribbon flowers or embellishments
- Hot glue gun and glue sticks
- Toothpick
How to:
Separate your lid from the bottom of your container and begin with the lid.
Glue a piece of lace around the outside top of the lid making a collar for the dress.
Doll Head

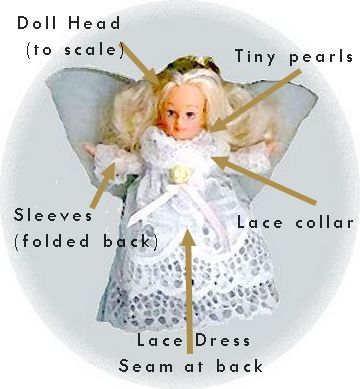
Doll faces come in many shapes and sizes so choose one for the size and scale of your pill box. Angel wings, arms and doll heads, of all sizes, are readily available in the doll-making section of a dollar store or hobby store.
Some doll heads have a wire leading from the bottom out. You can’t easily push this through the cap of a pill bottle so trim the wire then secure the doll head with hot glue to the lid. Fasten a teeny strand of pearls around the neck area with glue.
Halo:
To make the halo, snip a toothpick to a length that will reach from the top of the head to the base of the dolls neck. Wrap a piece of gold ribbon around the toothpick, beginning at the bottom, working your way up the toothpick and covering the toothpick with ribbon completely.
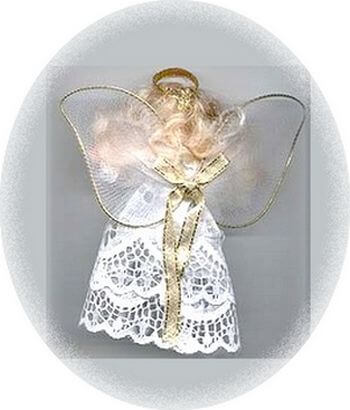
When you reach the top of the toothpick, form a circle (the halo) with the ribbon and wrap back down the toothpick. Push the toothpick through the dolls hair to the neck and secure at the neck with a dot of glue.
Lacy Angel Dress

To make the dress, wrap a piece of lace around the container allowing about 1/2 inch overlap. Depending on the size of your lace you may need to cut more than 2 pieces. The lace that I used is 2.5 inches long and required two pieces to form the dress.
The first piece of lace is glued about halfway up from the bottom of the container or whereever you need it positioned so that the bottom edge aligns with the bottom of the container. A high temperature glue gun is best as the lower temperature glue may not work as well.
Complete the dress by gluing your second piece of lace to the top of the canister, leaving a little space at the top if needed to replace the lid. Be sure to begin and end your lace at the same place as your first piece of lace.
Sleeves:
Cut two small pieces of lace that will fit around the doll arms to form sleeves. Glue this to the top of the arm going around the entire arm and making sure the seam of your lace will not be seen when the arms on placed on the angel.
Secure the bottom of the lace (near the hand) with a dab of glue to secure the seam and, if necessary, roll up the lace at the hand area to shorten it and allow the hand to show. The front assembly photo, shown above, shows the sleeves rolled back from the doll hands.
Attach the arms by securing them with a generous amount of hot glue at the top of your container (not the lid).
Angel Wings:
Glue a pair of purchased wings, of suitable scale, to the back of the angel body (see back of angel above for details).
On top of the wings attach a small piece of gold ribbon that is tied in a bow, placing the ribbon in the centre of the wings. Leave the tails of this ribbon the length of the dress and secure the ribbon at the bottom of the dress with a tiny bit of hot glue. This ribbon not only looks pretty but also hides the seams of your lace.
For a little extra embellisment try gluing two teeny ribbon roses and a small bow to the top front centre of the dress.
Finishing Touches:
Make this angel into a a hanging decoration by feeding a strand of ribbon or floss through the top of the head with a large embroidery needle then tie it in a knot. This strand acts as your hanger.
For a standing angel ornament add a little weight to the container with a few marbles or sand.
Now put your lid and container together and your pill bottle angel is all done!
Editor’s Note: Version two coming soon. If you’re eager to see it now: Alternate Pill Bottle Angel
Copyright © 1999-2023 Susan Spatone All rights reserved.
Leave a Reply