Last updated on January 20th, 2025 at 01:44 am

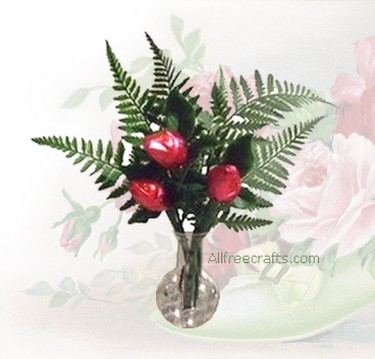
Chocolate Rose Kisses Bouquet
by Jane Lake
Make a delightful bouquet of Hershey kisses rosebuds for your Valentine. These chocolate roses only look expensive – in reality, all the supplies are readily available at most dollar stores. And, once you get the hang of it, the individual roses go together quite quickly.
These chocolate rose kisses also make a perfect addition to our recycled coffee creamer Valentine bouquet.
Supplies for one rosebud:
2 Hershey kisses – preferably in red and white Valentine colors
5″ square of red cellophane wrapping paper
12″ chenille stem
18″ length of green florist’s tape
a stem of artificial rose leaves; we used a stem with three leaves for each rose
artificial ferns or other background greenery
small glass vase
glass marbles or stones
Rosebud Kisses – Instructions:
1. Fold the chenille stem exactly in half and set aside.
2. Lay one of the Hershey Kisses on its side, on top of the cellophane square, so that the sharp end points toward a corner. Lay the second Hershey Kiss, also on its side, so that the flat end meets the flat end of the first Kiss and the sharp end points toward the center.
3. Draw the opposite corner of cellophane over top of both Kisses, so that the Kisses are centered inside a diagonal triangle of cellophane.
4. Use your fingers to hold the Kisses in place as you draw the two side corners up toward the top, gathering the cellophane together as you go. Twist the cellophane together at the top to form a rosebud shape around the chocolate kisses.

5. Slide the folded chenille stems around the gathered cellophane and twist the stems together tightly to hold the cellophane in place.
6. Position the rose leaves behind the wrapped rosebud and secure them in place with another twist of the chenille stems. Continue twisting the chenille stems around each other all the way down to the bottom for improved strength.
7. Take an 18 inch length of green florist’s tape and begin wrapping tape around the base of the rosebud, completely covering the stem of the leaves then and proceeding downwards along the length of the twisted chenille stem. Pull the tape gently and overlap it as you work; there should be enough tape to come back up the stem at least half way.
8. Repeat the above steps for each Rose Kiss that you wish to make.
9. Add clear glass marbles or stones to the bottom of a small glass vase. Add the stems of background greenery. Nestle the chocolate rosebuds among the greenery, sliding each stem firmly into the marbles to secure in place. Consider adding a few homemade felt or fabric rosebuds to fill out the vase and add variety,


Leave a Reply