Last updated on November 20th, 2019 at 08:05 pm
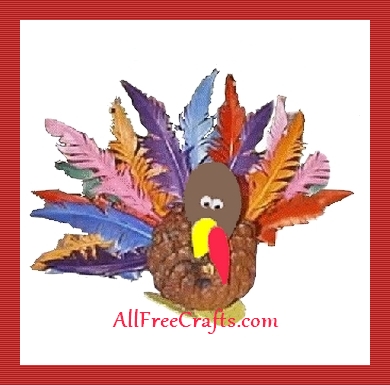
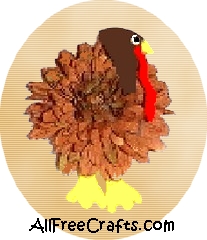
Learn how to make a pine cone turkey with a feathered tail for Thanksgiving or fall. This easy project includes a printable turkey face and craft instructions.
By Jane Lake and Twila Lenoir
Craft Supplies:
- 4 inch pine cone
- 22 assorted colored feathers
- Turkey Pattern
- 2 tiny plastic eyes
- fun foam scraps in brown, yellow and red
- glue
Craft Instructions:
1. Print and cut out the turkey pattern. Trace the patterns piece on fun foam in appropriate colors and cut out. You may also use card stock and paint or color the pieces with crayons or markers.
2. First place your pine cone on the table and turn it around a few times to find a spot where the pine cone will naturally stay put and not roll around.

3. If the feathers have been packed tightly in a bag, fluff them out by running your fingers down the length of each one from the end of the feather to tip. Spread the feathers out into a fan shape moving each one until you have a pleasing arrangement of colors.
4. Begin gluing the feathers into the spaces of the pine cone, starting about four rows back from the widest end of the pine cone and moving toward the narrow tip of the pine cone. Make the first three rows with five feathers each, make the next row with four feathers, and make the last row with three feathers.
5. Glue the face pieces to the wide end of the pine cone, beginning with the brown tear drop head pattern, then the yellow tear drop and, finally, the red tear drop shape. Glue the goggle eyes on close together.
6. To finish your pine cone turkey, glue on the yellow feet.
This will make a bright, cheerful, and very colorful centerpiece for the Thanksgiving table. Enjoy!
Variations from around the net:
Pine Cone and Fall Leaves Turkey

Leave a Reply