Last updated on February 4th, 2021 at 08:21 am
EMBROIDERY INSTRUCTIONS
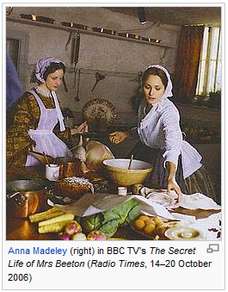
excerpted from the “Beeton Book of Needlework”
Isabella Beeton is most well known as the author of Mrs Beeton’s Book of Household Management, a best-seller when it was first published in 1861, and still appreciated as a cookery book and a unique glimpse into Victorian middle-class life. This first book was followed by many other titles, including the “Beeton Book of Needlework,” published in 1870, a comprehensive needlework guide that included illustrated instructions for knitting, crochet, tatting and embroidery. Most recently, you can purchase a Kindle edition of Beeton’s Book of Needlework – Full Illustrations, Index and Menu from Amazon.
AllFreeCrafts is reader supported! Many supplies are found at thrift stores so try that first! However, if you buy from an affiliate link on this site, I earn a commission at no extra cost to you. As an Amazon associate, I earn from qualifying purchases. This has kept AllFreeCrafts.com online since 2002. Thank you!
The following excerpt is a nice introduction to Victorian embroidery, although it is interesting to observe that many of the stitches are still relevant in embroidery patterns today.
EMBROIDERY INSTRUCTIONS
The art of embroidering with cotton on linen, muslin, cambric, pique, etc., is very easy to learn by strictly attending to the following instructions.
The size of the thread and needle must correspond to that of the material on which you embroider; the needle must not be too long, and the cotton must be soft. Messrs. Walter Evans and Co.’s embroidery cotton is the best. Skillful embroiderers never work over anything, because when you tack the material on paper or cloth each stitch shows, and if the material is very fine, leaves small holes; but for those that are learning we should advise them to tack the material to be embroidered upon a piece of toile ciree.
If you work without this, place the material straight over the forefinger of the left hand; the material must never be held slantways. The three other fingers of the left hand hold the work; the thumb remains free to give the right position to each stitch. The work must always, if possible, lie so that the outline of the pattern is turned towards the person who works.
For the sake of greater clearness one part of the following illustrations is given in larger size than nature. Preparing the patterns is one of the most important things in embroidery, for the shape of the patterns is often spoiled merely because they have not been prepared with sufficient care.
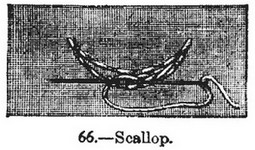
ILLUSTRATION 66 shows how to prepare a scallop. Take thicker cotton than that with which you work; never commence with a knot, and do not take a thread longer than sixteen or eighteen inches.
The outlines of the scallops are first traced with short straight stitches. In the corners particularly the stitches must be short. The space between the outlines is filled with chain stitches, as can be seen from illustration; they must not be too long, otherwise the embroidery will look coarse.
It is in this way that every pattern to be worked in button-hole or satin stitch is to be prepared.
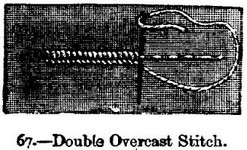
ILLUSTRATION 67 shows the double overcast stitch or button-hole stitch in a straight line. After having traced the outline begin to work from left to right; fasten the cotton with a few stitches, hold it with the thumb of the left hand under the outline, insert the needle downwards above the outline, draw it out under the same above the cotton which you hold in the left hand, and draw it up.
Repeat for all the stitches in the same manner; they must be regular and lie close to one another. Great care should be taken that the material on which you embroider is not puckered.
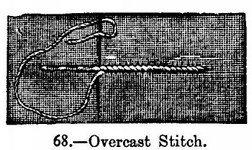
ILLUSTRATION 68 (Overcast Stitch).–The double overcast and the button-hole stitches are worked from left to right, whilst back stitches, knotted and satin stitches are worked from right to left.
The stitch is worked in the same way as the double overcast, only the needle must never be drawn out above, but below, the cotton with which you work, and which you keep down with the thumb of the left hand.
ILLUSTRATION 69.–The slanting overcast stitch is worked without tracing the outline, always inserting the needle downwards–that is, from top to bottom.
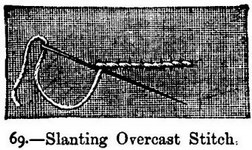
The needle must be inserted in the manner shown in illustration–that is, not straight, but slanting; insert it a little farther than the last stitch, and draw it out close to it.
The wrong side of the work must show back stitches. This sort of stitch is used for the fine outlines in patterns or letter.

ILLUSTRATION 70: (Back Stitch)
This shows the back stitch, the working of which is well known; it is worked in several rows close to each other.
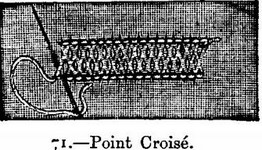
ILLUSTRATIONS 71 and 72 show another kind of back stitch, called point croise, which is only used on very thin and transparent materials.
This stitch forms on the wrong side a sort of darned pattern, which is seen by transparence on the right side, and gives the embroidered pattern a thicker appearance, contrasting with the rest of the work (see the lower leaves of the flower on illustration 110).
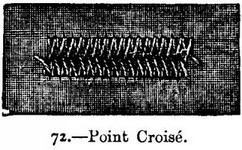
For this stitch insert the needle into the material as for the common back stitch, draw it out underneath the needle on the opposite outline of the pattern, so as to form on the wrong side a slanting line. Insert the needle again as for common back stitch; draw it out slanting at the place marked for the next stitch on the opposite outline, as shown in illustration 71.
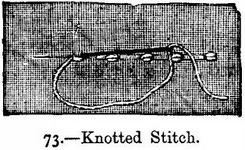
ILLUSTRATION 73 shows the knotted stitch.
The simplest way of working the knotted stitch is to work two back stitches at a short distance from each other over the same thread.
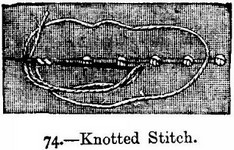
The knotted stitch seen in ILLUSTRATION 74 is worked thus:–Take about four threads of the material on the needle, draw the needle half out, wind the cotton twice round the point of the needle, hold it tight with the thumb, draw the needle out carefully and insert it at the place where the stitch was begun, and draw it out at the place where the next stitch is to be worked.
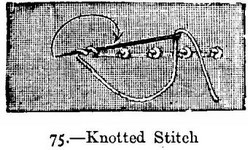
The knotted stitch variation seen on ILLUSTRATION 75 is worked in nearly the same manner as the preceding one. Before drawing the cotton out of the material hold it tight with the left-hand thumb; leave the needle in the same position, wind the cotton twice round it, turn the needle from left to right, so (follow the direction of the arrow) that its point arrives where the cotton was drawn out (marked by a cross in illustration), insert the needle there, and draw it out at the place of the next stitch.
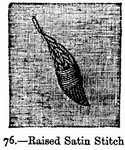
ILLUSTRATIONS 76 and 77.–Raised satin stitch is principally used for blossoms, flowers, leaves, letters, etc. After having traced the outlines of the pattern, fill the space left between them with chain stitches in a direction different from that in which the pattern is to be embroidered; begin at the point of the leaf, working from right to left, make short straight stitches, always inserting the needle close above the outline and drawing it out below.
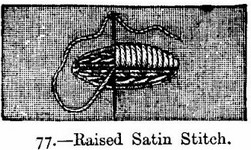
The leaves on the flowers, as well as on the branches, must be begun from the point, because they thus acquire a better shape.
If you wish to work a leaf divided in the middle, as seen in illustration 77, you must trace the veining before you fill it with chain stitches, then begin at one point of the leaf and work first one half and then the other.
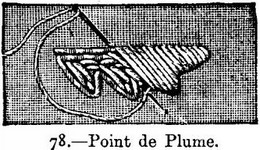
ILLUSTRATION 78 shows the so-called point de plume on a scalloped leaf.
It is worked like the satin stitch, only the needle is drawn through the material in a slanting direction.

ILLUSTRATION 79 (Point de Minute).–This stitch is often used instead of satin stitch when the patterns must appear raised. Wind the cotton several times round the point of the needle, which is inserted into the material half its length (the number of times the cotton is to be wound round the needle depends on the length of the pattern), hold fast the windings with the thumb of the left hand, draw the needle and the cotton through the windings, insert the needle into the material at the same place, and draw it out at the place where the next stitch is to begin.
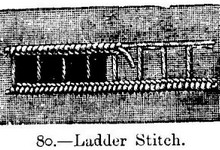
ILLUSTRATIONS 80 and 81 show the ladder stitch, often used in ornamental embroidery.
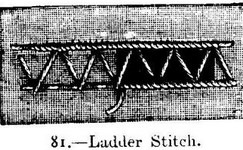
Trace first the outlines as seen in illustrations; mark also the cross stitches between the outlines, so that the first touch the outlines only at both ends. The outlines are embroidered in overcast stitch or double overcast; the material is cut away underneath the ladder stitch between the outlines.


Leave a Reply