Last updated on May 29th, 2020 at 11:37 am
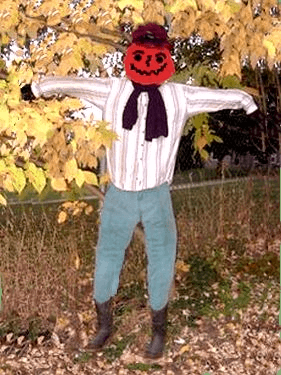
Scarecrows have been around for centuries, ever since tribal farmers discovered that a human lookalike set in fields would frighten away birds and protect the crop. But what is the difference between the scarecrow pictured here and more traditional scarecrow figures? The frame for this scarecrow is made from tent frame poles, recycled from an old pop-up style dome tent, enabling the scarecrow to stand on two legs, rather than one.
By Jane Lake
On this page, you’ll find step-by-step photos and instructions on how to make a tent-pole scarecrow, plus excellent links and resources for the more usual “broomstick” style scarecrow. Either way, you’re sure to find a scarecrow craft project that works for the supplies you have available and the purpose you have in mind; from Fall landscape decorating, Halloween celebrations or, for those in England, Guy Fawkes night.
Tent Pole Scarecrow
Supplies:
- 6 tent frame pole sections, about ½ inch diameter and two feet long; these are normally connected to each other with elastic cording (which is removed for this project)
- rubber boots or similar tall footwear, such as cowboy boots
- gravel, sand, or another heavy substance to fill the boots
- discarded clothing – pants, shirt, gloves, scarf, hat etc.
- masking tape or duct tape
- one metal clothes hanger
- safety pins
- newspaper
- head (supplies can vary): paper bags, fabric, pillowcases, stockings or tights, plus stuffing material
 Tent-Pole Scarecrow
Instructions:
1. Connect three, two-foot long tent poles together to form a scarecrow frame stick that is about six feet high. Reinforce the connections with masking tape or duct tape so that none of the sections will come apart. Make another stick in the same way.
2. Fill two boots with a heavy anchoring medium such as gravel or sand.
3. Slide one of the scarecrow frame sticks inside a pair of pants or jeans and down through one of the pant legs. Slide the other frame stick into the other pant leg. Insert the bottom end of one stick deeply into one of the filled boots. Repeat with the other stick. Place the boots a step apart, then join the two frame sticks together at the top with masking tape. See the Caught…with Pants Down photo (above, left) for details.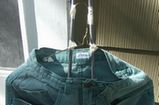
4. Insert a metal coat hanger inside the waist band of the pants (secure with safety pins, if needed) and draw the pants up the pole frame to a natural height. Secure the coat hanger to the frame with masking tape or duct tape, as shown in the photo at right. You can bend the coat hanger a little to best suit the position of your frame, but do allow the curve at the top of the hook to provide a natural separation of the frame at this point.
5. Connect two more tent poles together with masking tape. Slide this stick into one arm of a long-sleeved t-shirt, shirt or coat, and out through the other arm, to begin the upper body of the scarecrow.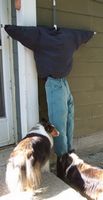
6. Connect the center point of the upper body frame to the existing frame with masking tape and/or string at an appropriate point. To find the appropriate place, hold the upper body frame over the existing frame and decide whether you wish the upper clothing to overlap the pants or be tucked inside. Keep in mind that the remainder of the main frame (the part showing above the collar) will be used for the head.
7. Begin stuffing all parts of the scarecrow body with crumpled newspaper. When you are done, the scarecrow body should look something like the photo at right. As you can see, this headless scarecrow effigy is already making my two dogs mighty curious.
/>8. At this point, I decided to add another shirt over the original shirt, because the black shirt I had used originally looked a little boring. The original was tucked in, but I decided to leave the next one overlapping the pants. It was a little short for this, so I ended up fastening it down in a few places at the hem with safety pins.
9. For the scarecrow’s hands, you can use stuffed gloves or mittens, or simply wads of hay or straw, tied in place 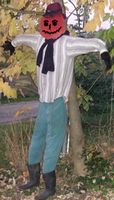 at the end of the arms. Some scarecrows look great with no hands – just leave the wrists of your coat or shirt dangling off the ends of the upper body frame.
10. For the head – well, let imagination and your access to supplies be the cue. This could be as simple as a brown-paper bag or plastic grocery bag, filled with newspaper and then upturned over the frame and fastened at the neck. The head of our scarecrow was a discarded round pillow, but it could also be a latex Halloween mask carefully stuffed from behind in some manner then attached to the scarecrow. Add a scarf or hat as the fancy takes you.
Notes
I had this scarecrow standing alone for quite a long time – but then a blustery wind put paid to my illusions, so I can tell you from experience – although this guy has two legs, that isn’t quite enough to support the weight of the scarecrow all by itself. Lean your scarecrow against a wall or tree or some other support or, better yet, tie him in place – mine is at the bottom of the driveway, leaning against a tree, with the scarf around his neck also going around the tree trunk behind him. You’d never know unless you step up close to see. And, if you do that – well, Mr. Scarecrow got to you, didn’t he? If he also brings a smile to your face, he’s worth every step!
Traditional Scarecrow Crafts:
If you’d prefer to make a more traditional scarecrow using a single wooden support, check out: 2 x 4 Scarecrow, from the University of Nebraska Cooperative Extension.
Also see this charming video, where Explorer Dylan and his dad show us how to make a leaf-filled scarecrow with a pillowcase head.

What a great video of Dylan making a scarecrow!