Last updated on October 16th, 2015 at 09:45 pm
How to dry hydrangeas for floral displays and craft projects.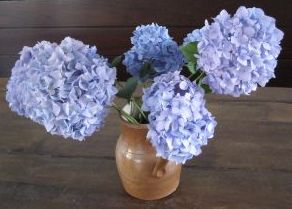
by Jane Lake
If you’re lucky enough to have established hydrangeas growing in your yard, then you already know how spectacular the large hydrangea flowerheads look on the shrub. The flowers may be white, blue or pink, depending largely on the acidity of the soil.
Whatever the color, hydrangeas look lovely when dried and can be used in a variety of large scale dried flower arrangements. The white blossoms are particularly popular for wedding flowers.
Here we explain how to dry your own hydrangea flowers, although you can also buy ready-made dried hydrangeas in many craft stores and even on ebay.
We also have instructions on how to use your dried hydrangeas to make a DIY Hydrangea Wreath.
.

Air Drying Hydrangeas
Timing is the key to successful air drying of hydrangeas. It is best to leave the flowerheads on the shrub until late summer or early fall, when the petals begin to dry out on their own. After cutting, you can finish the drying process by arranging the stems in a tall vase (without water) or hanging them upside down to air dry.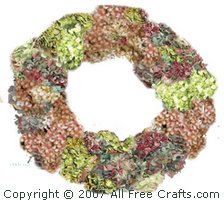
Drying Hydrangeas with Silica Gel
Silica Gel, despite its name, comes in crystal form. It is a high-quality drying agent that is used to dry many varieties of flowers. It is valued because it does an excellent job of preserving the original colors and shape of the blossoms. The drying process when using silica gel is also relatively fast.
1. Select a plastic container just slightly larger than the flower you are drying.
2. Pour a half inch of silica gel crystals into the bottom of the container.
3. Cut the stem fairly short, to fit into the container, and remove leaves. You can lengthen the stems later.
4. Hold the flower suspended in the center of the container, just above the layer of silica gel. Gently pour more silica gel around the bloom until is submerged in about an inch of crystals. You should be able to release the flower at this point. Continue sifting crystals onto and around the flower, taking particular care to make sure crystals surround the center petals and pouring extra crystals around the edges so that they fall naturally under the petals.
5. Occasionally tap the container to help settle the contents. You aim is to preserve the natural shape of the flower by surrounding it entirely by the drying medium.
6. Continue adding silica gel until the hydrangea is covered by at least a half inch of crystals.
7. Put a lid on the container and store in a safe place for four days.
8. Gently pour out the silica gel, removing the flower and gently shaking it to dislodge the crystals. If needed, you can use a soft makeup brush to remove any crystals that continue to stick to the petals.
9. Use the flowers immediately, or store in a clean, dry protected container until use.
8. To lengthen the stems, use either another piece of dried stem or florists wire, attaching to the short flower stem with green florist’s tape.
Caution:
Although silica gel (readily available at craft stores) is quite expensive, you can use it repeatedly. You should follow the directions on the canister carefully, work in a well ventilated area, and wear a face mask if you use silica gel frequently – it is not a substance that you want to breathe into your lungs!




Leave a Reply