Last updated on August 19th, 2015 at 12:54 pm
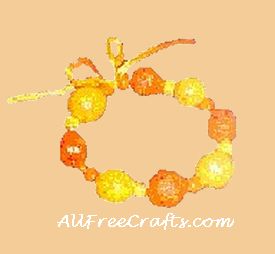
Free Knitting Pattern: Knit a Beaded Bracelet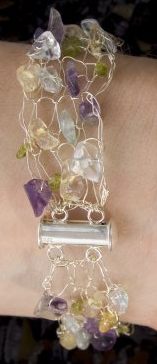
If you are one of those knitters that has to touch every yarn you see (and owns a good bit of it), then you probably look at the myriads of beads on the market with an envious eye. All of those colors and textures are just begging to be tried. But – how can you possibly knit with every yarn and learn to bead at the same time? Here’s a logical solution: knit with beads.
Like you, I like to try new ideas, but so many seem to take too long to learn or too much of an investment. That is what led me to design a beaded bracelet that a beginner knitter could do with expert results. While knitting jewellery is a bit more tedious, in just a couple of hours you will have a piece that costs hundreds of dollars at a jewellery show (and you can say you knit your original yourself).
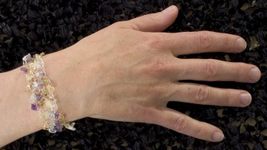
There are thousands of beads: glass, crystal, gemstone, clay, wood, etc. Any of which could be incorporated into a unique piece of jewellery, but for a basic bracelet (shown here in blue topaz, crystal quartz, and aquamarine) I recommend beads approximately 4mm in size.
.
Materials
- »1 spool of 34 gauge silver or gold jewelry wire
- »1 clasp (toggle clasps work well)
- »100-200 4mm beads (depending on wrist size and desired width of bracelet)
- »1 rubber band
- »#2 needles (bamboo or aluminum that you don’t mind scratching)
Method
- »Pre-string the beads on the wire.
- »You will be knitting above the beads, so let out enough wire to give you room to work. (Helpful Hint: If your wire is tempted to spin off the spool like an out of control slinky, I recommend pulling out a length and than wrapping the spool with a rubber band.)
- »Cast on 4 sts, leaving at least an 8” tail (using simple loop technique) taking care not to pull too tight.
- »Purl 1st st, slide a bead up tight, purl the next st. Slide a 2nd bead up tight and purl the next st. Side 3rd bead up tight and purl the last st.
- »Turn and knit 1 row.
- »Repeat rows 4 and 5 until desired length. NOTE: Be sure to tug on the finished rows or the bracelet will grow upon wearing. Finish off with a bead row and cast off.
Finishing
- »Using a sewing needle (or the wire itself), weave the end of the wire in and attach one piece of the clasp at teach end. Weave wire through the clasp several times to secure and tuck in the ends.
About the author: Like many knitters, Marnie Stockman learned from her mother when she was 6, 8, 10, each time completing at least one square before moving on to her next activity. While always having a knitting project going, it wasn»t until Marnie wanted to be a stay–at–home mom that her business Frivolous Fibers became a reality. Now with a line of felted purse kits (including a line of leather, bamboo, rattan, and beaded handles), she has tried her hand at wire and bead knitting. Please check out her other wire and bead designs at Frivolous Fibres. Happy knitting!
Photography: Molly Crealock
Originally published in the now defunct Spun Magazine.
Leave a Reply