Last updated on September 7th, 2015 at 09:26 pm
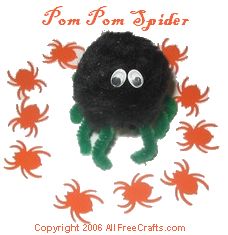
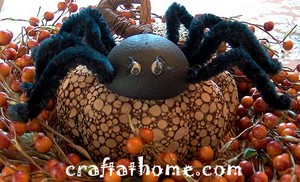
Traditional pompom spiders for Halloween.
![]() Although you would think these fuzzy pompom spiders are easy to do, attaching the legs can be tricky, especially for younger children. Hopefully, these directions will minimize any frustration and lead to the creation of lots of pompom spider decorations for your home or classroom.
Although you would think these fuzzy pompom spiders are easy to do, attaching the legs can be tricky, especially for younger children. Hopefully, these directions will minimize any frustration and lead to the creation of lots of pompom spider decorations for your home or classroom.
You will need:
- pom poms – we used a pompom ball of about 1½ inches diameter
- 1 or 2 chenille stems – usually black, for the legs, but we used green to show how the spider goes together (and it looks fine!)
- tacky glue (white glue will work, but takes longer to “hold” and dry; hot glue also works well, but must be done by an adult)
- plastic google eyes
- optional – string for hanging or magnets to attach to the fridge
![]()
Craft Instructions:
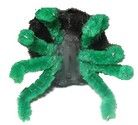 1. Cut a chenille stem in half, then in half again, so you have four equal sized pieces to use as the legs. We used short legs on the spider in the photo, but if you want longer legs, use two chenille stems and simply cut both of them in half. Check the photo of the upside down spider (at right) to see how the legs are attached.
2. Take one of the chenille pieces and bend it at about a 45 degree angle, at the half way point, to make two legs. It should look like a wide “V” shape. You can now put a slight curve on each half of the “V” to shape the legs a little. It will begin to look like a wide “U” shape. Don’t worry if they don’t look exactly right – you will make final adjustments when all the legs are firmly glued in place. Make three more stems this way.
3. Spread apart some of the fibers on the pompom and smear a small blob of tacky glue in this space (about half the size of a dime). One at a time, begin attaching the legs by pushing each of them into the glue at the midway point, so one leg points outwards on each side. Add a little more tacky glue to the top center of all the legs. Now use your fingers to pinch some of the pom pom fibres together over this glue. Hold together until you can feel the glue start to work. Gently let go and then set the spider upside down (with its legs in the air) to dry.
4. Once the legs are glued on firmly, you can adjust the shape of the legs to suit yourself. You can bend tiny feet at the end of the legs, or push the legs flatter or higher, depending on how you want the finished pom pom spider to look.
5. Place a tiny drop of tacky glue on the back of each plastic goggle eye and press into place on the spider. You might want to experiment without glue first, because you can get all kinds of interesting faces by trying different eye positions.
6. If you like, glue on some invisible thread or black string to hang your spider up. Or glue a magnet to the pom pom to use the spider as a Halloween fridge decoration.
Leave a Reply