Last updated on February 23rd, 2020 at 03:41 pm
How to Sew a Gingham Egg
by Jane Lake
Gingham is such a cheerful fabric that it seems a natural for this little sewing pattern. However, I do think all kinds of fabric could be used – calicoes, stripes, or felt, for instance – to produce a wide range of textures and effects.
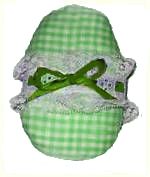
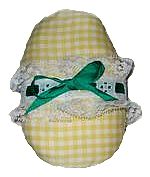
A fabric egg also lends itself to all manner of decorations. Here, we used a length of lace, threaded with ribbon which was tied in a bow. But sew on whatever you have handy – sequins, buttons, rick-rack, pearls or embroidered motifs.
Caution: If you are making this as a gift for a baby or toddler, make sure the fabric, stuffing and any embellishments are child-safe.
Sewing Instructions:
Print out the egg pattern, or draw an egg-shaped pattern to your own dimensions. If printed to the original size, the egg pattern provided here should be about six inches high and four and a half inches wide.
Fold a piece of gingham with right sides together. Trace the egg pattern onto one side of the fabric. Cut around the pattern, through both layers of fabric.
Keep the egg shapes with right sides together, and sew all around, using a half inch seam, reversing a few stitches at the beginning and the end of the seam to secure it. Leave a two inch opening on one side to stuff.
Turn the egg right sides out and stuff with fibrefill.
Hand sew the opening closed.
Decorate as desired.


Leave a Reply