Last updated on December 14th, 2024 at 12:40 am
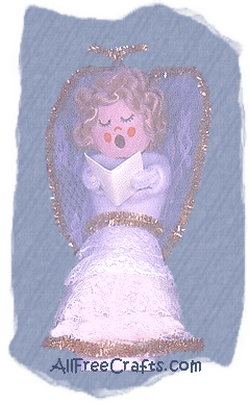
This recycled light bulb angel is suitable for use as a Christmas tree topper, tree trim, or table decoration.
by Jane Lake
Who would ever guess this choir angel began life as a broken lightbulb? I think she would also make a wonderful Christmas gift, presented in a nice box packed with a cloud of white tissue paper!
Craft supplies:
- One burned out lightbulb
- One styrofoam (1.5″) ball
- 1.5″ diameter white plastic bottle cap
- White and flesh tone (or light pink) acrylic craft paint
- 4″ square of white felt
- Approx. 26″ pregathered 1/2″ lace, or other fabric scraps to make the skirt
- Approx. 4 gold or silver pipe cleaners and 1 white pipe cleaner
- Scraps of lace netting, tissue paper, or dryer sheet to use as the wing backing
- Cast-off or purchased synethetic hair piece, available in the dollar stores in a wide variety of colours for about $1 each – look for one that features curly corkscrew type lengths of hair; alternatively, use doll hair, yarn, or fashion a lace cap as a head dressing.
- Sundry Items: Glue gun and glue sticks, scissors, measuring tape, black and red pens.

Project Instructions:
1. Begin by painting the glass part of the lightbulb with white craft paint. If you are going to use an opaque fabric for the skirt that will not show the lightbulb, you may omit this step.

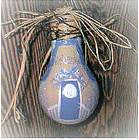
2. Glue the light bulb to the 1-1/2″ white bottle cap as shown in photo at right.
3. Next, cut a 4″ inch length of white pipe cleaner and fold over the ends by about a half inch to form the hands. Bend the pipe cleaner into a u-shape and position around the screw top of the light bulb, quite near the top, to create the doll’s hands and arms. Hot glue in place at the back.
4. Take the 4″ square of felt and fold into a triangle over the screw top of the light bulb and the pipe cleaner assembly, poncho style. Use a dab of hot glue to fasten one triangular point at the approximate center waist position, and the opposite triangular point at the same height at the back.
5. Now bring the side triangular points around to the front and glue in place. This will form sleeves around the arms, as shown in the photo to the right. (This photo shows the steps of assembly, from positioning the light bulb on the the bottle cap stand, to folding the felt to create the dress bodice.)
You will find that the pipe cleaner forms a slight hump in the back of the doll figure, but this helps position the wings and isn’t seen in the finished angel.
6. Paint the styrofoam ball in flesh tone or light pink craft paint. When dry, draw on the facial features, using ordinary black and red pens, following the photos.
7. Cut lengths of synthetic corkscrew style hair to fit in rows on the head and use hot glue to secure. Create a halo from a length of gold pipe cleaner and glue in place before placing the hair strips at the back. When the head is complete, hot glue in place on top of the felt.
8. Begin the skirt by hot gluing the 26″ length of pre-gathered lace in rows on the bulb. Start at the bottom, at the back, and work your way gradually up to the waist, ending at the back. Cut off any excess. Cut a strip of gold pipe cleaner to go around the waist and hot glue in place. Another length of pipe cleaner should be hot glued to the lowest tier of lace.
9. The wings shown were made from two full length gold pipe cleaners, each shaped into an egg shaped oval and fastened together in the middle by the ends of the pipe cleaners. Some variety is possible here, depending on how large you want the wings.
When you have a wing shape that you like, hot glue a scrap of lace netting, tissue paper, or even a used dryer sheet to the wings. Cut off the excess.
Now attach the wings at the back of the angel, using hot glue.
10. The final touch is to make a small hymn book for the angel to hold. I used a strip of a yellow post-it note, folded and glued to the hands. Now you’re done – but it’s such a lot of fun to make this little blonde angel, why not make a brunette and a red head to sing in the choir as well?


Leave a Reply