Last updated on September 18th, 2024 at 10:17 pm
Film canister soldier can also be made by recycling other small plastic containers with flat lids.
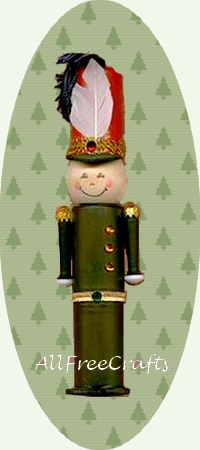
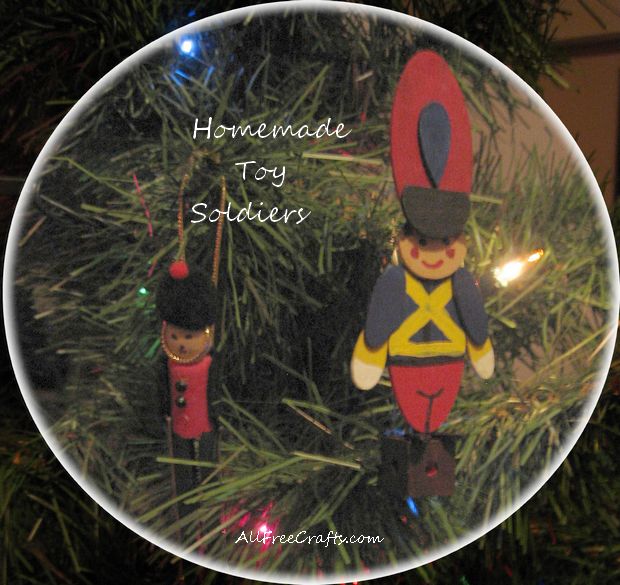
Recycle those old film canisters or pill bottles to make an old-fashioned toy soldier ornament perfect for Christmas tree trimming. Although film canisters aren’t as common as they once were, you could also try this craft project by substituting other small plastic containers with lids.
Material:
- 3 film canisters (2 with lids) – or try pill bottles!
- 1 1-1/2 inch wood doll head
- 1 1-3/4 inch wood mini shaker pegs
- 1 1-1/2 wood heart
- 5 gold 5mm rhinestones
- 1 blue 5mm rhinestone
- 1 red 7mm rhinestone
- Decorative gold trim
- Ornament caps or gold trim
- 1 white feather
- 1 navy blue tassel
- Black and red pencils
- Paint For Plastic By Plaid: red, black and white
- Rubbing alcohol
- Hot glue gun and glue
- Scissors
- Gold metallic pen
- Black craft foam
- foam
How to:
If your film canisters are black with a gray lid, you won’t need to paint them for the body. Before painting your canisters, clean them with rubbing alcohol and let dry.
Glue the wooden heart to the bottom of one canister with lid attached, then glue the second canister with lid attached to the lid of the canister attached to the heart. Paint the canisters and heart with black paint. Paint shaker pegs black and ends of pegs white. Paint remaining canister without lid, red. Allow all paint to dry.
Once all your paint is dry, glue wood doll head to top of body. Glue a single feather to front center of red canister [hat], glue a piece of gold trim around the edge of the hat. Start and end your trim at the front and then glue a red rhinestone over the ends to hide the seam. Glue a tassel to the top center of hat.
Using a canister as your template, place the canister with the open end top on top of black foam. Trace around the canister to make a circle the size of your canister opening. Cut out circle from foam. Place your canister on top of your circle [about one third from edge of circle] and draw around again, but only creating a suitable rim for the hat. You will end up with something that looks like a banana shape. Cut the excess off the circle [refer to photo]. Glue your hat rim just inside of the hat opening. You now have a complete hat.
Once the glue has set, attach your hat to the doll head by filling the inside edge of the hat opening with glue.
Don’t worry about glue running inside of the canister hat, just be careful that it can’t be seen from the outside.
With a gold metallic marker, paint the two canister lid edges at the center of the body, allow the paint to dry and glue a green rhinestone to the front center of the gold rim. For the arm caps, I used two ornament caps that were saved from broken glass ornaments. If you don’t have any, simply wrap a piece of gold trim around the top arm of the peg and secure with glue. If you do, glue one to each arm top.
At the very top of the arm, glue a gold rhinestone. This will cover any black that is visible and will cover the hole at the top of an ornament cap.
Glue three rhinestones in place for buttons and draw a face. I used regular pencil crayons for the face. Be sure they are sharp, as the face detail is very small.
All details are drawn with a black pencil except for the cheeks which are lightly shaded circles of red.
Note: If you want to hang these soldiers, before you paint the hat canister, poke a hole in the bottom and feed knotted ribbon through the hole with the knot remaining inside the canister and a loop of ribbon on
the outside. They do stand quite nicely all by themselves though.
Copyright © 1999-2024 Susan Spatone All rights reserved.
Published with permission from CraftAtHome.
Beautiful crafts to upcyle!
Thank you! This is an older DIY but it’s still a cute Christmas recycling project.